Hot cocoa is a beloved beverage enjoyed by many. It’s rich, creamy, and comforting. While many people use pre-packaged cocoa powder, making hot cocoa from raw cocoa beans is a rewarding process. This article will guide you through every step, from sourcing your cocoa beans to enjoying a delicious cup of hot cocoa.
Understanding Cocoa Beans
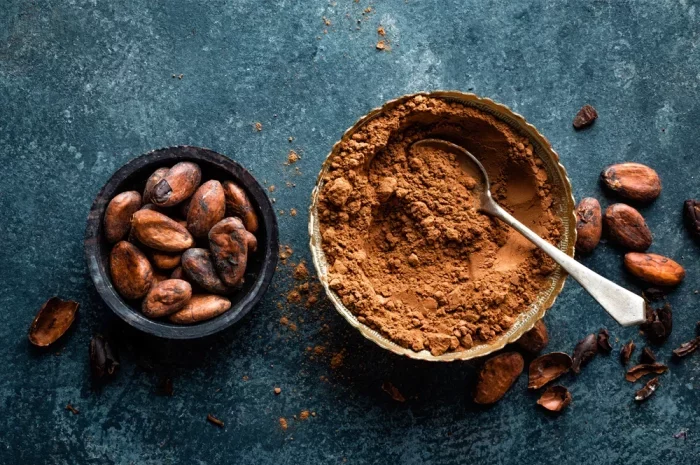
Before we dive into the recipe, let’s understand what cocoa beans are. Cocoa beans are the seeds of the cacao tree (Theobroma cacao). These beans are fermented, dried, roasted, and processed to create chocolate products, including cocoa powder and cocoa butter.
Health Benefits of Cocoa
Cocoa beans are packed with nutrients and antioxidants. They contain flavonoids, which can improve heart health, boost mood, and provide anti-inflammatory benefits. Making hot cocoa from whole beans can maximize these benefits, as you are using the beans in their most natural form.
Sourcing Your Cocoa Beans
Where to Buy Cocoa Beans
You can find raw cocoa beans at health food stores, specialty grocery stores, or online. Look for high-quality, organic beans to ensure the best flavor and health benefits.
What to Look For
When choosing cocoa beans, look for:
Color: Good quality beans are dark brown.
Texture: They should feel firm and not too brittle.
Aroma: Fresh cocoa beans have a rich, chocolatey aroma.
Tools You Will Need
Making hot cocoa from cocoa beans requires some specific tools:
Roasting Pan: For roasting the beans.
Oven: To roast the beans.
Food Processor or Mortar and Pestle: For grinding the beans.
Sieve or Cheesecloth: To separate the cocoa nibs from the husks.
Double Boiler or Saucepan: For melting the cocoa.
Whisk: For mixing the ingredients.
Measuring Cups and Spoons: For accurate measurements.
Mug: For serving your hot cocoa.
Step-by-Step Guide to Making Hot Cocoa from Cocoa Beans
Step 1: Roast the Cocoa Beans
Roasting the cocoa beans enhances their flavor. Here’s how to do it:
Preheat the Oven: Set your oven to 350°F (175°C).
Spread Beans on a Baking Sheet: Arrange the cocoa beans in a single layer on the roasting pan.
Roast: Place the baking sheet in the oven and roast the beans for about 15-20 minutes. Stir them halfway through to ensure even roasting. The beans should have a rich aroma when done.
Step 2: Remove the Shells
After roasting, you need to remove the shells from the cocoa beans. Here’s how:
Let Them Cool: Allow the roasted beans to cool for a few minutes.
Crack the Beans: Place the beans in a bowl and gently crack them. You can use a mortar and pestle or simply use your hands.
Separate the Nibs: Use a sieve or cheesecloth to separate the cocoa nibs from the shells. The nibs are the edible part you will use for hot cocoa.
Step 3: Grind the Cocoa Nibs
Next, you need to grind the cocoa nibs to create cocoa liquor.
Add Nibs to Food Processor: Place the cocoa nibs in the food processor.
Grind Until Smooth: Blend the nibs until they turn into a smooth paste. This can take several minutes. Scrape down the sides as needed.
Consistency: The final product should be a thick, chocolatey liquid called cocoa liquor. You can also use a mortar and pestle for a more traditional approach, but it requires more effort.
Step 4: Prepare Your Hot Cocoa Base
Now that you have cocoa liquor, it’s time to prepare the hot cocoa base.
Ingredients for Hot Cocoa
- 2 tablespoons cocoa liquor
- 2 cups milk (or milk alternative)
- 2 tablespoons sweetener (sugar, honey, or maple syrup)
- 1 teaspoon vanilla extract
- Pinch of salt
- Optional toppings: whipped cream, marshmallows, or cinnamon
Step 5: Heat the Milk
Use a Double Boiler: Fill the bottom pot with water and place it on medium heat.
Combine Ingredients: In the top pot, combine the milk, cocoa liquor, sweetener, vanilla extract, and salt.
Heat Gently: Stir the mixture while it heats. Avoid boiling the milk, as this can change the flavor.
Step 6: Mix the Hot Cocoa
Once the milk is warm:
Whisk Vigorously: Use a whisk to combine the ingredients thoroughly. This will create a frothy texture.
Adjust Sweetness: Taste your hot cocoa and add more sweetener if needed.
Step 7: Serve and Enjoy
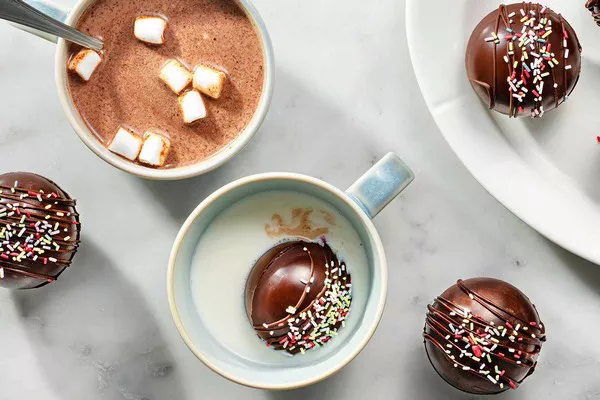
Pour into Mugs: Carefully pour the hot cocoa into your favorite mugs.
Add Toppings: Top with whipped cream, marshmallows, or a sprinkle of cinnamon for added flavor.
Garnish (Optional): You can also add chocolate shavings or a drizzle of chocolate syrup on top.
Step 8: Savor the Flavor
Take a moment to enjoy your homemade hot cocoa. The rich flavor from the freshly ground cocoa beans will give you a unique experience unlike any store-bought mix.
Variations of Hot Cocoa
Making hot cocoa from cocoa beans allows for a variety of delicious variations:
Spicy Hot Cocoa
Add a pinch of cayenne pepper or chili powder for a spicy kick.
Mint Hot Cocoa
Stir in peppermint extract for a refreshing twist.
Mocha Hot Cocoa
Mix in a shot of espresso for a caffeinated treat.
Coconut Hot Cocoa
Use coconut milk instead of regular milk for a tropical flavor.
Tips for the Best Hot Cocoa
Quality Matters: The quality of your cocoa beans will significantly impact the flavor of your hot cocoa.
Experiment with Sweeteners: Try different sweeteners to find your preferred taste.
Temperature Control: Be mindful of the temperature when heating milk to preserve its creamy texture.
Storage: If you have leftover cocoa liquor, store it in an airtight container in the fridge for up to a week.
Conclusion
Making hot cocoa from cocoa beans is a rewarding and delicious process. With a little patience and the right tools, you can create a rich, creamy beverage that warms your heart. Enjoy experimenting with different flavors and techniques to make your perfect cup of hot cocoa. Whether you’re snuggled up at home or sharing with friends, this homemade treat is sure to bring joy to your day.
Related topics:

