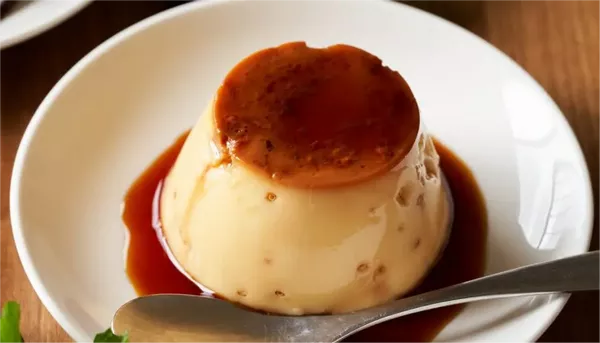
Crème Brûlée is a classic and indulgent dessert that has won the hearts of many with its creamy custard base and that satisfyingly crunchy caramelized sugar topping. While the recipe itself is a delicate balance of ingredients and techniques, an often overlooked aspect is the choice of what to make it in. The vessel you use can impact the baking process and the final presentation of this elegant treat. In this comprehensive article, we’ll explore the various options for making Crème Brûlée, along with detailed production steps from start to finish, ensuring that you can create a perfect Crème Brûlée every time.
Step 1: Choosing the Right Vessel for Crème Brûlée
Material: Ramekins are perhaps the most common choice for making Crème Brûlée. They are typically made of ceramic or porcelain, which have excellent heat retention properties. Ceramic ramekins are sturdy and can withstand high oven temperatures without cracking easily. Porcelain ramekins often have a smooth, elegant finish that makes for a beautiful presentation when serving.
Size: Ramekins come in various sizes, but for Crème Brûlée, ones with a capacity of around 4 to 6 ounces are popular. A smaller size ensures that the custard bakes evenly throughout and develops a nice texture. However, you can also use larger ramekins if you prefer a more substantial serving, but you may need to adjust the baking time accordingly. For example, a 4-ounce ramekin might bake in about 30 to 40 minutes, while a 6-ounce ramekin could take 40 to 50 minutes.
Advantages: They are easy to handle, stackable for storage, and widely available in kitchenware stores. The even heat distribution in ceramic or porcelain ramekins helps in creating a smooth and creamy custard. Plus, their individual serving size makes them perfect for dinner parties or when you want to serve a plated dessert.
Disadvantages: They can be a bit fragile, so you need to handle them with care. Also, if you don’t have a lot of ramekins, you might have to bake the Crème Brûlée in batches if making a larger quantity.
Material: Shallow baking dishes can be made of glass, ceramic, or metal like stainless steel. Glass baking dishes, such as Pyrex, allow you to easily monitor the baking process as you can see the custard changing color and setting. Ceramic ones offer good heat retention similar to ramekins, while metal baking dishes heat up quickly and can provide a more even heat spread across the custard if they are of high quality.
Size: A shallow baking dish with a depth of about 1 to 1.5 inches and dimensions like 8×8 inches or 9×13 inches can be used. The shallower depth compared to a deeper baking pan helps in ensuring that the custard bakes evenly and doesn’t end up with a soggy bottom.
Advantages: If you’re making a larger quantity of Crème Brûlée to serve a group, a baking dish can be more convenient than multiple ramekins. It also allows for a different presentation style, perhaps cutting the set custard into squares or portions after baking. You can use it for other desserts or dishes as well, making it a versatile addition to your kitchenware.
Disadvantages: Baking in a dish might make it a bit trickier to achieve a consistent texture throughout the entire custard, especially towards the edges. Also, when it comes to caramelizing the sugar on top, you need to be careful to cover the entire surface evenly, which can be more challenging compared to individual ramekins.
Step 2: Gathering the Ingredients for Crème Brûlée
Type: Heavy cream is the preferred choice for making Crème Brûlée. It has a high fat content, usually around 36% or more, which gives the custard its rich and creamy texture. You’ll typically need about 2 to 2 ½ cups for a standard recipe, depending on the number of servings you plan to make.
Quality: Opt for fresh, high-quality heavy cream. Look for ones that are free from any off odors or signs of spoilage. The better the quality of the cream, the more luxurious the final custard will taste.
Alternatives: If you prefer a lighter version or have dietary restrictions, you can use a combination of heavy cream and whole milk. For example, you could use 1 cup of heavy cream and 1 cup of whole milk instead of just all heavy cream. However, keep in mind that this will result in a slightly less rich custard.
Quantity: Egg yolks are a crucial component as they help thicken the custard. You’ll usually need 6 to 8 large egg yolks for a recipe that serves around 4 to 6 people. The yolks contain proteins and fats that, when combined with the heat during baking, create a smooth and thick consistency.
Separation: It’s important to separate the egg yolks from the whites carefully. You can do this by cracking the egg and gently passing the yolk back and forth between the two halves of the shell, allowing the white to drip into a separate bowl. Make sure there are no bits of egg white mixed with the yolks, as this can affect the texture of the custard.
Quality: Use fresh eggs for the best results. Older eggs might have thinner whites and less vibrant yolks, which could impact the custard’s flavor and texture.
Type: Granulated sugar is commonly used. You’ll need about ½ to ¾ cup for the custard base, depending on your taste preferences. The sugar not only sweetens the custard but also plays a role in its texture and stability during baking.
Amount Adjustment: If you like a sweeter custard, you can add a bit more sugar, but be cautious not to add too much as it can cause the custard to become overly sweet and might even affect its ability to set properly. On the other hand, reducing the sugar amount too much will result in a less flavorful custard.
Step 3: Preparing the Custard Mixture
Pour the heavy cream into a saucepan. Place the saucepan over medium-low heat. Stir the cream gently as it heats up to prevent it from scorching on the bottom of the pan. Heat the cream until it just begins to steam and small bubbles form around the edges. This indicates that it’s hot enough but not boiling. Remove the saucepan from the heat immediately once it reaches this stage. Heating the cream helps in dissolving the sugar and also makes it easier to incorporate with the egg yolks later.
Mixing the Egg Yolks and Sugar: In a separate mixing bowl, place the egg yolks. Add the granulated sugar to the egg yolks. Use a whisk or an electric mixer on low speed to combine them. Whisk until the mixture becomes slightly pale and thickened. This step incorporates the sugar evenly into the egg yolks and starts to aerate the mixture a bit, which will contribute to the final texture of the custard. It usually takes about 2 to 3 minutes of continuous whisking.
Combining the Cream and Egg Yolk Mixture: Slowly pour the heated cream into the egg yolk-sugar mixture while whisking constantly. This is a crucial step as pouring the cream too quickly can cause the egg yolks to scramble. By whisking continuously, you’re tempering the egg yolks with the hot cream, gradually raising their temperature without cooking them too quickly. Once all the cream has been added, continue whisking for another minute or so to make sure everything is well combined.
Adding Flavorings: If you’re using vanilla extract or other flavorings, add them to the custard mixture at this point. Stir gently with a spoon or a whisk to incorporate the flavorings evenly throughout the mixture. For example, if adding vanilla extract, just a teaspoon or two will suffuse the custard with its lovely aroma and taste.
Step 4: Pouring the Custard into the Chosen Vessel
Ramekins: If using ramekins, make sure they are clean and dry. You don’t need to grease them as the custard will set and release easily from the ceramic or porcelain surface. Place the ramekins on a baking sheet. This makes it easier to transfer them in and out of the oven and also catches any potential spills during baking.
Shallow Baking Dishes: For baking dishes, you can grease the bottom and sides lightly with butter if you’re concerned about the custard sticking. However, if the dish is of good quality and has a smooth surface, it might not be necessary. Pour the custard into the dish evenly, spreading it out with a spatula if needed to ensure an even layer.
Silicone Molds: Silicone molds are naturally non-stick, so no preparation is usually required. Just place them on a baking sheet or a stable surface before pouring in the custard to make handling easier during baking.
Cups or Mugs: Ensure that the cups or mugs are oven-safe. You can place them on a baking tray as well for stability. Pour the custard into each cup or mug, filling them to about ¾ full to allow for some expansion during baking.
Pouring the Custard: Carefully pour the prepared custard mixture into the chosen vessel(s). Use a ladle or a measuring cup with a spout to make the pouring process more precise and to avoid spills. If you’re using multiple vessels, try to divide the custard evenly among them. For example, if making 6 ramekins, pour an equal amount of custard into each one so that they all bake and set at a similar rate.
Conclusion
In conclusion,Traditional ramekins are a popular and effective choice due to their size, shape, and ability to withstand high oven temperatures. However, with careful consideration of material compatibility, heat distribution, and ease of caramelizing the sugar, other options such as oven-safe bowls, custard cups, and even certain types of baking dishes can also yield delicious results. Ultimately, the key to achieving the perfect creme brulee lies not just in the container but also in precise temperature control, proper mixing techniques, and a steady hand when caramelizing the sugar. Whether you opt for the classic ramekin or an alternative vessel, the most important factor remains your commitment to following a well-tested recipe and paying attention to detail throughout the preparation process. Bon appétit!
Related Topics:

