Custard Pudding, also known as Cream Pudding, is a delicious and popular dessert enjoyed by many. It’s smooth, creamy, and slightly sweet, making it a perfect end to a meal or a delightful treat at any time. Preparing custard pudding at home is easier than you might think, and with a few simple ingredients and steps, you can create a professional-quality dessert. In this article, I’ll guide you through the entire process, from gathering your ingredients to serving your delicious custard pudding.
Ingredients
Before you begin, make sure you have all the necessary ingredients. Here’s a list of what you’ll need:
- 2 large eggs
- 1 cup whole milk (you can use 2% or skim milk, but whole milk will yield a richer texture)
- 1/3 cup granulated sugar (adjust to taste)
- 1 teaspoon vanilla extract (optional, but highly recommended for flavor)
- 2 tablespoons cornstarch (acts as a thickener)
- A pinch of salt (to enhance flavor)
- Butter (for greasing the pudding mold or bowl)
- Demerara sugar (optional, for caramelizing the top)
- Water (for making caramel, if desired)
Equipment
You will also need some basic kitchen equipment:
- Mixing bowls
- Whisk or electric mixer
- Saucepan
- Pudding mold or oven-safe bowl
- Aluminum foil or parchment paper (for covering the pudding)
- Shallow baking dish (for water bath)
- Spoon or spatula
- Strainer (optional, but useful for removing lumps)
Step-by-Step Instructions
Step 1: Prepare Your Equipment and Ingredients
Grease the Mold: Butter the inside of your pudding mold or oven-safe bowl generously. This will prevent the pudding from sticking.
Preheat the Oven: Preheat your oven to 325°F (165°C). If you plan to use a water bath, place a shallow baking dish filled with hot water on the middle rack of the oven while it’s preheating.
Step 2: Mix the Dry Ingredients
Combine Dry Ingredients: In a medium mixing bowl, whisk together the cornstarch, granulated sugar, and a pinch of salt until well combined.
Step 3: Prepare the Egg Mixture
Beat the Eggs: In a separate large mixing bowl, beat the eggs until yolks and whites are fully combined and slightly frothy.
Temper the Eggs: Gradually add about a quarter of the milk to the eggs, whisking constantly to prevent the eggs from scrambling. This process, known as tempering, helps to slowly bring the eggs up to a safer cooking temperature.
Step 4: Combine Ingredients
Add Dry Mixture: Slowly whisk the dry mixture into the egg-milk mixture until smooth.
Add Remaining Milk and Vanilla: Gradually whisk in the remaining milk and vanilla extract until fully incorporated. Your custard mixture should be smooth and free of lumps. If there are any lumps, you can strain the mixture through a fine-mesh strainer into another bowl.
Step 5: Cook the Custard
Heat the Milk Mixture: Pour the custard mixture into a heavy-bottomed saucepan. Cook over medium heat, stirring constantly with a whisk, until the mixture thickens and begins to bubble around the edges (about 5-7 minutes). Be careful not to let it boil, as this can cause the eggs to scramble.
Check for Doneness: The custard is done when it coats the back of a spoon and holds its shape slightly. If you’re unsure, dip a spoon into the custard and run your finger through the custard on the spoon. If the line stays clean, it’s ready.
Step 6: Pour into Mold
Pour Into Mold: Pour the cooked custard into the prepared mold or bowl. Tap the mold gently on the counter to remove any air bubbles.
Step 7: Prepare for Baking (Optional Water Bath)
Cover the Mold: Cover the mold with aluminum foil or parchment paper, making sure it’s tight to prevent steam from getting in.
Place in Water Bath: Carefully place the covered mold in the preheated water bath in the oven. The water bath helps to gently cook the custard and prevent it from cracking or curdling.
Step 8: Bake the Custard
Bake: Bake in the preheated oven for about 30-40 minutes, or until the custard is set but still slightly jiggly in the center. The exact baking time may vary depending on your oven and the size of your mold.
Check for Doneness: To check if the custard is done, insert a knife or toothpick into the center. It should come out clean or with just a few moist crumbs attached.
Step 9: Cool and Chill
Cool: Remove the mold from the water bath and let it cool on a wire rack for about 30 minutes.
Chill: Once cooled, refrigerate the custard for at least 2-3 hours, or until fully set. For best results, refrigerate overnight.
Step 10: (Optional) Caramelize the Top
Prepare Caramel: If you want a caramelized top, you can make a simple caramel by heating 2 tablespoons of granulated sugar and 1 tablespoon of water in a small saucepan over medium heat until it turns amber in color. Be careful, as caramel can burn quickly.
Pour Caramel: Once the caramel is ready, quickly pour it over the top of the chilled custard, allowing it to drip down the sides. Let it harden before serving.
Serving Your Custard Pudding
Unmold (if necessary): If you used a mold, run a knife around the edges to loosen the custard. Invert the mold onto a serving plate and gently tap the bottom to release the custard.
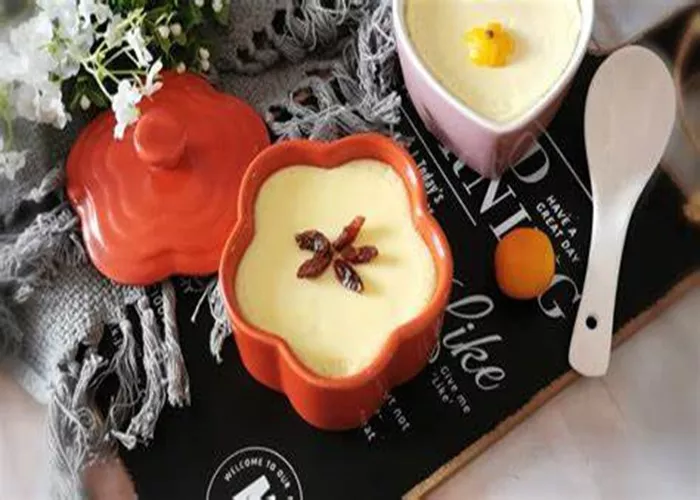
Garnish: You can garnish your custard pudding with a dollop of whipped cream, a sprinkle of cinnamon, or fresh berries for added flavor and presentation.
Serve: Slice and serve your delicious custard pudding to your guests or family. Enjoy!
Conclusion
Preparing custard pudding at home is a rewarding experience that yields a delicious and impressive dessert. With just a few simple ingredients and some basic kitchen equipment, you can create a professional-quality custard pudding that will impress even the most discerning palate. The smooth, creamy texture and slightly sweet flavor make it a perfect end to a meal or a delightful treat at any time. Whether you’re serving it to friends and family or simply enjoying it on your own, custard pudding is sure to delight. So gather your ingredients, follow the steps outlined above, and enjoy the sweet, creamy taste of success. Happy baking!
Related Topics:


