Red velvet cake, known for its striking red hue and creamy frosting, is a beloved dessert that can be found in many bakeries and homes. While boxed red velvet cake mix offers convenience, it often lacks the rich, moist, and flavorful characteristics that make this cake truly special. With a few simple tweaks and additions, you can transform a standard boxed mix into a gourmet-quality red velvet cake that will impress your friends and family. This article will guide you through various techniques and ingredients to elevate your boxed red velvet cake from ordinary to extraordinary.
Understanding the Basics
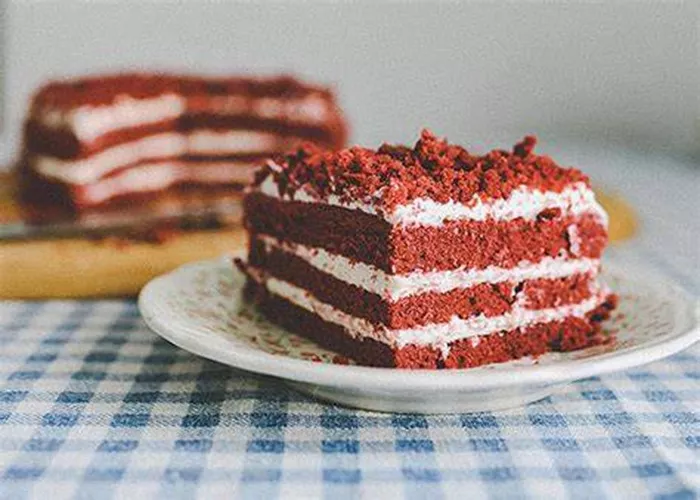
Before diving into the enhancements, let’s first understand what makes red velvet cake unique. Red velvet cake is characterized by its deep red color, which is achieved using cocoa powder and red food coloring. It’s typically moist and tender, with a slight tanginess from vinegar or buttermilk. The classic pairing is with cream cheese frosting, which complements the cake’s flavor beautifully.
Ingredients and Substitutions
While boxed cake mixes provide a good starting point, they often contain preservatives and artificial flavors that can detract from the cake’s quality. By making a few substitutions and additions, you can significantly improve the taste and texture of your red velvet cake.
Butter and Oil
Substitution: Replace some of the vegetable oil called for on the box with unsalted butter. Butter adds a richer flavor and can make the cake more moist. Start by replacing half of the oil with an equal amount of melted and cooled unsalted butter.
Eggs
Addition: Boxed mixes often call for just a few eggs. Adding an extra egg or two can improve the cake’s structure and moisture. Follow the box instructions but add one or two extra eggs for a denser, more tender cake.
Buttermilk
Substitution: Buttermilk is a key ingredient in traditional red velvet cake recipes. It reacts with the baking soda to create a tender crumb and adds a slight tanginess. If your mix calls for water, substitute it with buttermilk. If you don’t have buttermilk, you can make a substitute by adding 1 tablespoon of vinegar or lemon juice to a cup of milk and letting it sit for 5 minutes.
Cocoa Powder
Addition: Even though the mix already contains some cocoa powder, adding a bit more can intensify the chocolate flavor. Use high-quality unsweetened cocoa powder and add 1/4 to 1/2 cup extra to the mix.
Red Food Coloring
Enhancement: The red color in red velvet cake comes from food coloring. To achieve a vibrant red hue, use gel food coloring instead of liquid. Gel coloring is more concentrated and will give you a brighter, more vivid color without altering the cake’s texture too much. Start with 2 to 3 tablespoons of gel food coloring and adjust as needed.
Flour
Quality: Use high-quality all-purpose flour for the best texture. Avoid using bleached flour, as it can affect the cake’s flavor.
Sugar: Option: If you prefer a less sweet cake, you can reduce the amount of sugar called for on the box by up to 1/4 cup.
Mixing and Baking Techniques
Once you’ve gathered your ingredients, it’s time to mix and bake. Here are some tips to ensure your cake turns out perfectly:
Room Temperature Ingredients: Make sure all your ingredients, especially the eggs and butter, are at room temperature before you start mixing. This ensures that they blend together smoothly and evenly.
Mixing Method: Follow the box instructions for mixing, but use an electric mixer to ensure thorough blending. Mix the wet ingredients (butter, oil, eggs, buttermilk, and vanilla extract) until well combined. Then, add the dry mix (cake mix, cocoa powder, and flour) and mix until just combined. Overmixing can lead to a dense, tough cake, so be careful not to overdo it.
Food Coloring Integration: Add the red food coloring to the wet ingredients before adding the dry mix. This ensures that the color is evenly distributed throughout the batter.
Baking Pans: Use two 9-inch round baking pans for a standard two-layer cake. Grease and flour the pans well to prevent sticking. You can also line the bottoms with parchment paper for easy release.
Oven Temperature and Baking Time: Preheat your oven to the temperature specified on the box, but keep in mind that ovens can vary. Start with the recommended time and check the cakes at the midpoint. They should be set and spring back to the touch, but not overly dry. If they need more time, bake in increments of 5 minutes and check again.
Cooling:
- Allow the cakes to cool in the pans for about 10 minutes, then transfer them to wire racks to cool completely.
- Cooling is crucial for the cakes to set properly and for easier frosting.
Frosting and Decorating
No red velvet cake is complete without its signature cream cheese frosting. Here’s how to make it and some tips for decorating:
Cream Cheese Frosting
Ingredients: 8 oz (1 block) cream cheese, softened; 1/2 cup (1 stick) unsalted butter, softened; 2 cups powdered sugar; 2 teaspoons vanilla extract; a pinch of salt.
Instructions: Beat the cream cheese and butter together until smooth. Gradually add the powdered sugar, one cup at a time, beating on low speed until combined, then increasing to high speed until fluffy. Add the vanilla extract and salt and mix well.
Chilling: For the best texture, chill the frosting for about 30 minutes before using. This will make it easier to spread and will give it a nice, firm texture.
Frosting the Cake:
- Place one cooled cake layer on your serving plate or cake stand. Spread a thick, even layer of frosting on top.
- Place the second layer on top and press gently to adhere. Frost the top and sides of the cake, using a spatula or offset knife for smooth, even layers.
Decorating: Add some flair to your cake with decorations like sprinkles, edible glitter, or fresh berries. You can also pipe some decorative borders or swirls with the remaining frosting.
Storage
To keep your red velvet cake fresh and moist, store it in an airtight container in the refrigerator. It will keep for up to 3 days. Before serving, let the cake sit at room temperature for about 30 minutes to soften the frosting.
Conclusion
With a few simple substitutions, additions, and techniques, you can transform a boxed red velvet cake mix into a gourmet dessert. By using high-quality ingredients, paying attention to mixing and baking methods, and adding a rich, creamy frosting, you’ll end up with a cake that’s moist, flavorful, and visually stunning. Whether you’re baking for a special occasion or just treating yourself, these tips will help you create a red velvet cake that’s sure to impress. Enjoy your baking!
Related Topics:


