Making a 2-tier cake may seem like a complicated task, but with the right steps, it can be a fun and rewarding experience. This guide will walk you through each part of the process, from baking the cakes to assembling and decorating the tiers. Whether you are preparing for a birthday, wedding, or any other celebration, this guide will make sure you end up with a beautiful and delicious 2-tier cake.
What You Will Need
Before you start, make sure you have all the necessary ingredients and equipment. Here’s a list to get you prepared:
Ingredients:
- Cake mix (or homemade cake ingredients)
- Butter
- Sugar
- Eggs
- Baking powder
- Flour
- Milk
- Vanilla extract (or your preferred flavor)
- Frosting (buttercream, cream cheese, or fondant)
- Filling (fruit, jam, or cream)
Equipment:
- Two round cake pans (one smaller, one larger)
- Cake boards (to support the tiers)
- A turntable (optional but helpful for frosting)
- Piping bags
- Offset spatula
- Cake dowels or straws (to support the top tier)
- Rolling pin (if using fondant)
- Serrated knife (for leveling the cakes)
- Cake scraper
Step 1: Preparing the Cake Batter
Making the Cake Batter:
Mix the Ingredients: Start by following the instructions on your cake mix, or make your cake batter from scratch. Combine butter, sugar, eggs, and any other wet ingredients. In a separate bowl, mix dry ingredients like flour, baking powder, and salt.
Add Wet and Dry Ingredients: Gradually add the dry ingredients to the wet mixture, alternating with the milk. Stir until the batter is smooth and well combined.
Flavoring the Cake: You can add vanilla extract or any flavoring you prefer, such as almond or lemon, to give the cake a unique taste.
Pouring the Batter into Pans:
Prepare the Cake Pans: Grease the cake pans with butter or cooking spray and lightly flour them. This will help the cakes come out easily once baked.
Divide the Batter: Pour the batter into two cake pans. The larger pan will hold the bottom tier, and the smaller pan will hold the top tier.
Bake the Cakes: Follow the baking instructions on your cake mix or recipe. Typically, cakes bake at around 350°F (175°C) for 25 to 30 minutes. Check doneness by inserting a toothpick into the center of the cakes. If it comes out clean, the cakes are ready.
Step 2: Letting the Cakes Cool
Cooling the Cakes: After baking, allow the cakes to cool in their pans for 10 minutes. Then, remove them from the pans and place them on wire racks to cool completely. If you try to frost them before they are fully cooled, the frosting may melt.
Step 3: Leveling the Cakes
Cutting the Cakes: Once the cakes are cool, use a serrated knife to level the tops. This is an important step to ensure the cakes are even and will stack properly.
Trimming the Sides: If needed, trim the sides to create a clean, smooth edge. This will also help with stacking the tiers later.
Step 4: Preparing the Frosting
Making Buttercream Frosting:
Ingredients: To make simple buttercream frosting, you will need butter, powdered sugar, vanilla extract, and milk. Start by beating the butter until soft and creamy.
Add Sugar: Gradually add powdered sugar to the butter, beating well after each addition.
Flavor and Consistency: Add a little vanilla extract for flavor and milk to adjust the consistency. The frosting should be smooth and spreadable, not too thick or runny.
Coloring the Frosting: If you want colored frosting, divide the frosting into different bowls and add food coloring to each.
Alternatives:
Fondant: If you plan to cover your cake with fondant, you can purchase ready-to-use fondant or make your own. Roll it out and cover the cake as described later in the guide.
Cream Cheese Frosting: For a tangy alternative, you can make cream cheese frosting by mixing cream cheese, butter, powdered sugar, and vanilla extract.
Step 5: Assembling the 2-Tier Cake
Building the Base Tier:
Placing the First Layer: Start by placing the larger cake layer on a cake board. The board will make it easier to move the cake around.
Adding Filling: If you want to add filling, spread a layer of frosting or jam on top of the first layer. Be sure to spread it evenly.
Placing the Second Layer: Place the second layer of cake on top of the filling, making sure it is centered.
Crumb Coat: Apply a thin layer of frosting over the entire cake. This is called the “crumb coat,” and it helps seal in crumbs. Once applied, chill the cake for about 30 minutes to set the crumb coat.
Preparing the Top Tier:
Repeat the Process: Follow the same steps to prepare the smaller tier. Once baked, leveled, and cooled, frost and fill the smaller cake.
Adding a Cake Board: Place a small cake board under the top tier to support it when placed on the bottom tier. The board should be the same size as the top tier or slightly smaller.
Step 6: Stacking the Tiers
Support Dowels: Before placing the top tier on the bottom tier, insert dowels into the base tier. These dowels will provide support and prevent the cake from collapsing. Cut the dowels to the height of the bottom tier, so they are level with the top of the cake.
Place the Top Tier: Once the dowels are in place, gently lift the top tier and set it on top of the bottom tier. Make sure it is centered.
Step 7: Final Touches and Decorating
Smooth Frosting:
Apply Final Coat of Frosting: After stacking the tiers, use a spatula or cake scraper to smooth the frosting over the entire cake. You can achieve a clean, professional look by smoothing the frosting and edges.
Decorating the Cake:
Piping Decorations: Use a piping bag to add details like borders, flowers, or intricate designs. Be creative and add personal touches such as the recipient’s name or custom decorations.
Adding Fondant Decorations: If you’re using fondant, roll it out and cover the entire cake or cut it into shapes for decorative accents.
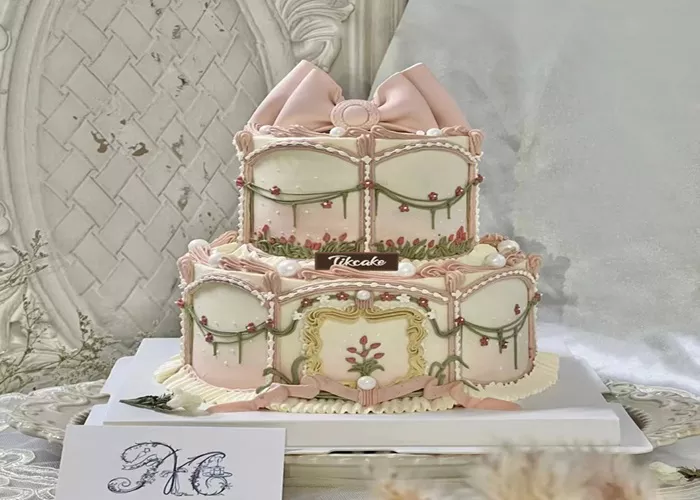
Toppers: A cake topper is a great way to personalize your 2-tier cake. You can add figurines, flowers, or even a simple “Happy Birthday” sign.
Step 8: Serving the Cake
Chill the Cake: Before serving, it’s a good idea to chill the cake for a few hours so the frosting can firm up, making it easier to cut and serve.
Cutting the Cake: When you’re ready to serve, use a sharp knife to slice through both tiers. Start by cutting the bottom tier and then move to the top tier.
Tips for Success
Be Patient: Building a 2-tier cake takes time, so don’t rush the process. Enjoy each step and take your time with decorating.
Use Sturdy Dowels: Ensure your dowels are strong enough to hold the weight of the top tier. If in doubt, use extra dowels for added support.
Level the Cakes Well: This is the key to a stable cake. Uneven layers can make the cake top-heavy and unstable.
Conclusion
Making a 2-tier cake is a creative and fun process. With careful planning, the right tools, and a little patience, you can create a stunning cake for any occasion. Whether you are baking for a wedding, birthday, or another celebration, your homemade 2-tier cake will surely be a hit!
Related topics


