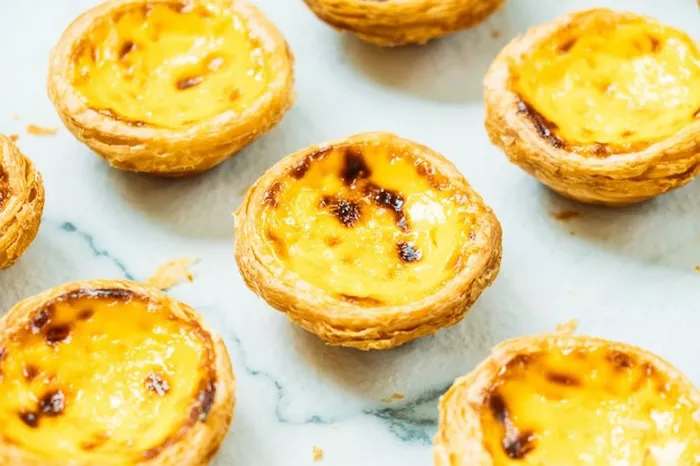
Egg tarts, a delectable pastry with a rich custard filling nestled in a flaky crust, have become a beloved treat worldwide. Whether you’ve savored them in a bakery or want to recreate this delightful dessert at home, this comprehensive guide will take you through the step-by-step process of making egg tarts. From crafting the perfect crust to achieving a luscious custard filling, follow along to unlock the secrets of mastering the art of egg tarts.
Choosing the Right Ingredients
Before diving into the preparation process, it’s crucial to gather high-quality ingredients for the perfect egg tarts. For the crust, you’ll need all-purpose flour, unsalted butter, sugar, and a pinch of salt. The custard filling requires eggs, sugar, evaporated milk, and vanilla extract. Having these fresh and premium ingredients will set the foundation for the exceptional flavor and texture of your homemade egg tarts.
Creating the Flaky Egg Tart Crust
The crust is the foundation of any great egg tart, providing a buttery and flaky vessel for the creamy custard. Start by combining all-purpose flour, sugar, and a pinch of salt in a bowl. Cut cold, unsalted butter into small cubes and incorporate it into the dry ingredients using a pastry cutter or your fingertips. The goal is to achieve a crumbly texture.
Once the mixture resembles coarse crumbs, add a small amount of ice-cold water and gently knead the dough until it comes together. Be cautious not to overwork the dough, as this can result in a tough crust. Form the dough into a disc, wrap it in plastic wrap, and refrigerate for at least 30 minutes. Chilling the dough allows the butter to solidify, ensuring a flaky texture when baked.
Rolling and Shaping the Crust
After the dough has chilled, roll it out on a floured surface to a thickness of about 1/8 inch. Using a round cookie cutter or a glass, cut out circles slightly larger than the size of your tart molds. Gently press each circle into the molds, ensuring an even distribution without any cracks.
To create the distinctive fluted edges of egg tarts, use your fingers to crimp the edges of the dough. This not only adds a touch of elegance but also helps the crust hold its shape during baking. Once the tart shells are prepared, chill them in the refrigerator while you move on to the custard filling.
Perfecting the Custard Filling
The soul of an egg tart lies in its velvety custard filling. Begin by cracking eggs into a bowl and whisking them until well beaten. Gradually add sugar, continuing to whisk until the mixture is smooth and pale. Slowly pour in evaporated milk, whisking continuously to ensure even incorporation.
For a delightful flavor boost, add a splash of vanilla extract to the custard mixture. The vanilla enhances the overall sweetness and aroma of the egg tarts. Strain the custard mixture through a fine-mesh sieve to remove any lumps and achieve a silky-smooth texture.
Filling the Tart Shells
Retrieve the chilled tart shells from the refrigerator and preheat your oven to the specified temperature, typically around 375°F (190°C). Carefully pour the custard mixture into each tart shell, leaving a small gap at the top to prevent overflow during baking. The custard will set as it bakes, creating a creamy interior encased in a golden crust.
Baking to Perfection
Place the filled tart molds on a baking sheet and transfer them to the preheated oven. The baking time is crucial for achieving the ideal texture of egg tarts. Bake until the custard is set but still slightly jiggly in the center. This usually takes around 15-20 minutes, but it’s advisable to keep a close eye on the tarts to prevent overcooking.
Allow the freshly baked egg tarts to cool in the molds for a few minutes before transferring them to a wire rack to cool completely. The cooling process is essential for the custard to firm up and the crust to achieve its desired flakiness.
Adding a Glaze (Optional)
For an extra touch of sweetness and shine, you can opt to glaze the tops of your egg tarts. Prepare a simple glaze by combining apricot jam with a small amount of water in a saucepan. Heat the mixture until it becomes a smooth liquid, then brush it onto the cooled tarts using a pastry brush. This not only adds a glossy finish but also imparts a subtle fruity flavor to complement the richness of the custard.
Presentation and Serving Suggestions
Egg tarts are as visually appealing as they are delicious, making them an excellent choice for a stunning dessert presentation. Arrange your freshly baked egg tarts on a serving platter, dusting them with a sprinkle of powdered sugar for an extra touch of elegance.
These delightful pastries can be served warm or at room temperature, making them versatile for various occasions. Whether you’re hosting a dinner party or craving a sweet treat with your afternoon tea, egg tarts are sure to impress with their combination of flaky crust and creamy custard.
Troubleshooting Tips
If you encounter any challenges during the egg tart-making process, here are some troubleshooting tips to ensure a successful outcome:
Cracking Crusts: If your crusts develop cracks during baking, it may be due to overworking the dough or not chilling it adequately. Ensure that the dough is rolled and handled gently, and allow it sufficient time to chill in the refrigerator.
Soggy Bottoms: To prevent a soggy crust, blind-bake the tart shells for a few minutes before adding the custard. This involves baking the empty tart shells with weights (such as dried beans) to ensure they hold their shape and don’t become overly moist.
Custard Overflow: Leaving a small gap between the custard and the top of the tart shell helps prevent overflow during baking. Be mindful not to overfill the shells, as the custard will expand as it cooks.
Conclusion
Congratulations! You have successfully mastered the art of making egg tarts from scratch. The harmonious blend of a flaky crust and a creamy custard filling is a testament to your culinary prowess. Whether you enjoy them on your own or share them with friends and family, these homemade egg tarts are sure to be a delightful and satisfying treat. Experiment with variations, explore different flavors, and most importantly, savor the joy of creating these miniature masterpieces in your own kitchen.


