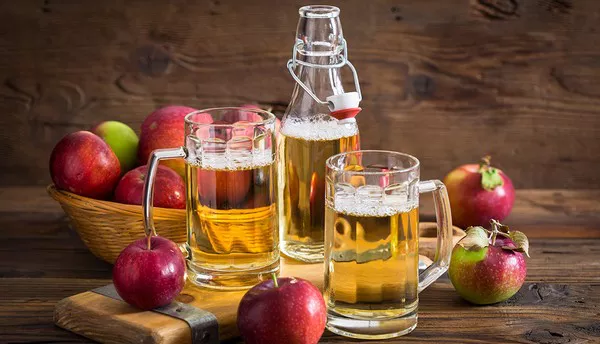
In recent years, the art of home brewing has experienced a revival, with enthusiasts exploring a wide range of beverages beyond the standard beer. One such beverage that has gained popularity is hard apple cider. With its crisp and refreshing taste, hard cider is not only enjoyable to drink but also relatively straightforward to make at home. In this comprehensive guide, we will walk you through the steps of crafting your own hard apple cider, from selecting the right apples to bottling the finished product.
Selecting the Right Apples
The foundation of great cider lies in choosing the right apples. Not all apples are ideal for cider-making; you’ll want a blend of sweet, tart, and aromatic varieties.
Traditionally, cider apples are categorized into three main types: sweet, sharp, and bittersweet/bittersharp. For a balanced cider, it’s best to use a blend of these varieties.
1. Sweet Apples: These apples provide the necessary sugars for fermentation. Varieties like Fuji, Gala, or Golden Delicious work well.
2. Sharp Apples: Adding acidity and tartness, sharp apples like Granny Smith or Cortland are great choices.
3. Bittersweet/Bittersharp Apples: These apples contribute complex flavors and tannins. Look for cider-specific varieties like Dabinett, Yarlington Mill, or Kingston Black.
If cider-specific apples are not available, you can create a blend using a mix of sweet and tart apples from your local grocery store or orchard. Aim for a combination that balances sweetness, acidity, and tannins.
Visit local orchards or farmers’ markets to source fresh apples, ideally in the autumn when varieties are abundant. Look for apples that are free from bruises or rot, as quality fruit yields quality cider.
Preparing Your Equipment
Before diving into cider-making, gather the necessary equipment:
- Fermentation Vessel: Use a food-grade plastic bucket or glass carboy with an airlock.
- Apples and Grinder: Obtain a crusher or grinder to turn apples into pulp.
- Press: Invest in a cider press to extract juice efficiently.
- Yeast: Choose a cider yeast strain for fermentation.
- Sanitizing Solution: Keep equipment clean with a food-safe sanitizer.
- Hydrometer: Measure sugar content for alcohol potential.
- Bottles: Collect bottles for storage, ensuring they are sterilized and sealable.
Preparing the Apples
Once you have your apples, the next step is preparing them for juicing. Follow these steps:
1. Washing: Thoroughly wash the apples to remove any dirt or residues.
2. Cutting and Grinding: Core and roughly chop the apples, then use a fruit grinder or food processor to crush them into a pulp. This pulp is called pomace.
Pressing the Juice
To extract the juice from the pomace, you’ll need a cider press. There are various types available, from hand-cranked to hydraulic presses. Place the pomace into the press and exert pressure to extract the juice. Collect the juice in a sanitized container.
Testing and Adjusting
Measure the specific gravity of the juice using a hydrometer. This measurement will help you estimate the alcohol content of the finished cider. Adjust the sugar content if necessary by adding sugar or water to achieve the desired level of alcohol and sweetness.
Fermentation
The next stage is fermentation, where the natural sugars in the juice are converted into alcohol by yeast. Follow these steps:
1. Yeast Selection: Choose a yeast strain suitable for cider making. Champagne yeast is a popular option as it ferments cider thoroughly and imparts a clean taste.
2. Pitching Yeast: Add the yeast to the juice. Stir gently to distribute the yeast evenly.
3. Fermentation Process: Transfer the juice into a sanitized fermenter with an airlock. Place it in a cool, dark area with a consistent temperature (ideally around 60-70°F or 15-21°C). Fermentation typically takes 1-2 weeks but can vary depending on conditions.
Monitoring and Racking
During fermentation, monitor the progress by checking the airlock activity. Once fermentation slows down and the cider clears, it’s time to rack the cider into a secondary fermenter. This step helps clarify the cider and reduces sediment.
Aging and Conditioning
Allow the cider to age and condition for several weeks to several months. This process improves the flavor and smoothness of the cider. Taste the cider periodically to determine when it’s ready for bottling.
Bottling
When the cider has matured to your liking, it’s time to bottle it. Follow these steps:
1. Siphoning: Carefully siphon the cider into clean, sanitized bottles, leaving behind any sediment.
2. Carbonation (Optional): If you prefer carbonated cider, add a small amount of priming sugar to each bottle before capping.
3. Corking or Capping: Seal the bottles with caps or corks and store them upright in a cool place.
Enjoying Your Hard Cider
After bottling, allow the cider to carbonate and condition for at least another week before refrigerating. Once chilled, your homemade hard cider is ready to be enjoyed!
Conclusion
Crafting hard apple cider at home is a rewarding experience that allows you to experiment with flavors and enjoy a beverage that reflects your personal taste. With the right apples, equipment, and a bit of patience, you can create delicious cider that rivals commercial varieties. So, gather your apples and start brewing—your homemade hard cider adventure awaits!
Related Topics:


