Hot cocoa is a beloved drink, especially during the colder months. Making your own cocoa powder from scratch allows you to control the ingredients and create a truly personalized cup of cocoa. In this article, we’ll guide you through the step-by-step process of making hot cocoa powder. You will also learn about the different variations and how you can adjust the flavor to your liking.
What Is Hot Cocoa Powder?
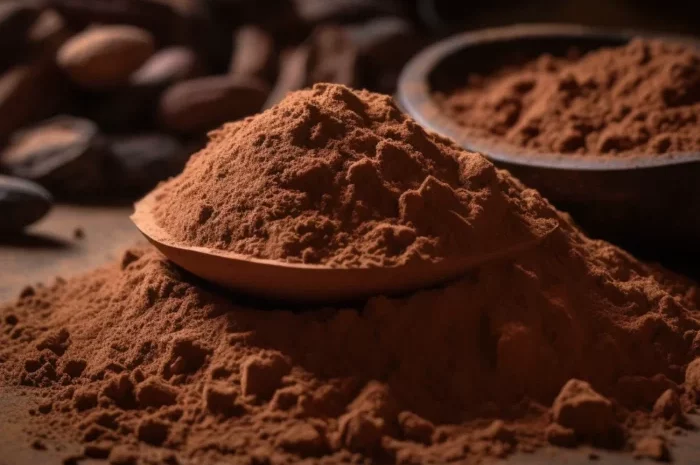
Hot cocoa powder is a dry mixture made from cocoa beans. When you combine it with milk or water, it turns into a rich, creamy drink. Hot cocoa powder typically consists of cocoa powder, sugar, and sometimes other flavorings or additives to enhance its taste.
The base of any good hot cocoa is cocoa powder, which is made from the seeds of the cacao tree. The seeds, or cacao beans, are fermented, dried, roasted, and then processed to extract cocoa powder and cocoa butter. The process of making hot cocoa powder is relatively simple, but it involves several steps.
Ingredients You Need
To make your own hot cocoa powder, you will need the following ingredients:
Cacao Beans: These are the raw source of cocoa powder. You can buy raw cacao beans, or you may purchase cacao nibs, which are already broken up beans.
Sugar: Granulated sugar is the most common, but you can experiment with alternatives like coconut sugar or stevia for a different taste.
Cocoa Butter: This is the fat from the cacao bean. It adds richness and smoothness to your cocoa powder. You can buy cocoa butter in blocks or as a liquid.
Optional Flavorings: Depending on your preferences, you may want to add spices like vanilla, cinnamon, or even chili for a bit of heat.
Step-by-Step Process of Making Hot Cocoa Powder
1. Harvesting and Preparing Cacao Beans
The first step in making hot cocoa powder is to start with high-quality cacao beans. If you’re starting from scratch, you will need raw cacao beans, which are harvested from cacao trees. The beans are typically encased in pods that are split open to reveal the beans.
Once you have the beans, they need to be fermented. This is an essential part of the process as it helps develop the beans’ flavor. After fermentation, the beans are dried in the sun and then roasted to further enhance the cocoa flavor.
2. Roasting the Cacao Beans
Roasting the cacao beans is an important step in the cocoa powder-making process. Roasting develops the flavor and makes it easier to extract the nibs. Here’s how you can roast your beans:
- Preheat your oven to 350°F (175°C).
- Spread the cacao beans evenly on a baking sheet.
- Roast them for about 20 to 30 minutes, checking and stirring occasionally to avoid burning. The beans should crack open and emit a strong cocoa aroma.
Once roasted, let the beans cool down to room temperature. After cooling, you should be able to crack the beans open to extract the nibs.
3. Extracting the Cocoa Nibs
The cacao nibs are the part of the bean that contains the most concentrated flavor and will be the foundation of your cocoa powder. To extract the nibs, you can use a mortar and pestle or a rolling pin. If you’re making a larger batch, you can also use a nutcracker or a food processor to break the beans into smaller pieces.
Once you’ve cracked the beans and removed the nibs, discard the husks and any larger fragments.
4. Grinding the Nibs into Cocoa Mass
After you have your cacao nibs, the next step is to grind them into cocoa mass. This process involves grinding the nibs until they form a smooth, liquid paste. The fat in the nibs will begin to release, turning the paste into a thick liquid.
If you are using a food processor or a stone grinder, it may take a few minutes for the nibs to fully break down. Be patient—this step is crucial for getting the right consistency.
5. Separating Cocoa Butter from Cocoa Powder
Once you have your cocoa mass, the next step is to separate the cocoa butter from the cocoa powder. The cocoa mass is made up of cocoa solids (which become the cocoa powder) and cocoa butter (which is the fat part).
To separate them, you need to use a process called pressing. In traditional methods, a hydraulic press is used to squeeze out the cocoa butter from the mass. However, if you’re making cocoa powder at home and don’t have a press, you can skip this step and simply blend the cocoa mass directly into powder form.
6. Drying the Cocoa Powder
Once you’ve separated the cocoa solids from the cocoa butter, the remaining cocoa solids are dried into cocoa powder. This is typically done by spreading the cocoa powder on a baking sheet and letting it dry for several hours. Alternatively, you can use a dehydrator to speed up the process.
The drying process helps to remove excess moisture and results in a fine, dry cocoa powder that is perfect for making hot cocoa.
7. Grinding the Dried Cocoa Powder
After the cocoa solids have been dried, you will need to grind them into a fine powder. Use a spice grinder or a food processor to do this. The goal is to get the powder as fine and smooth as possible.
If your cocoa powder is still a bit coarse after grinding, you can sift it through a fine-mesh strainer to remove any larger particles.
8. Mixing the Hot Cocoa Powder
At this point, you have your basic cocoa powder. However, to make it suitable for making hot cocoa, you’ll want to add sugar and any flavorings you like. Here’s how to mix it:
- In a bowl, combine your freshly ground cocoa powder with sugar. The ratio of sugar to cocoa powder depends on how sweet you like your cocoa. A common ratio is 2 parts sugar to 1 part cocoa powder.
- You can also add a pinch of salt, cinnamon, or a dash of vanilla extract to enhance the flavor.
- Mix everything together thoroughly to create a well-blended hot cocoa mix.
9. Storage
Once your hot cocoa powder is ready, store it in an airtight container to keep it fresh. A glass jar or plastic container works well, but make sure it’s tightly sealed to prevent moisture from getting in.
How to Make Hot Cocoa Using Your Powder
Now that you’ve made your own hot cocoa powder, it’s time to enjoy it! Here’s how to make a simple cup of hot cocoa:
- In a small saucepan, heat 1 cup of milk or water over medium heat.
- Add 2 to 3 tablespoons of your homemade cocoa powder mix to the liquid. Stir well.
- Continue stirring until the cocoa is fully dissolved and the drink is hot but not boiling.
- Pour the hot cocoa into a mug and enjoy!
Tips for Customizing Your Hot Cocoa Powder
Making your own hot cocoa powder offers plenty of opportunities to experiment and adjust the flavor to your liking. Here are a few tips to personalize your cocoa powder:
Use different sweeteners: Try honey, maple syrup, or coconut sugar instead of granulated sugar for a different flavor profile.
Add spices: Spice up your cocoa with cinnamon, nutmeg, chili powder, or even cayenne pepper for a warming kick.
Try different milks: Use almond milk, oat milk, or coconut milk for a dairy-free version. Each type of milk will add its own flavor to the cocoa.
Add vanilla or other extracts: A small amount of vanilla extract, almond extract, or hazelnut extract can give your cocoa an extra layer of flavor.
Benefits of Making Your Own Cocoa Powder
Customizable sweetness: Store-bought cocoa mixes are often too sweet. By making your own, you control the sugar content.
No additives or preservatives: Many commercial hot cocoa mixes contain artificial flavors or preservatives. Making your own ensures you’re using pure ingredients.
Healthier options: You can add ingredients like coconut sugar, stevia, or dark chocolate to make a healthier cocoa mix.
Conclusion
Making hot cocoa powder from scratch is a fun and rewarding process. Whether you’re using raw cacao beans or store-bought cacao nibs, you can easily create a rich, flavorful cocoa powder that’s perfect for hot cocoa. By controlling the sweetness, flavorings, and ingredients, you can make a delicious, homemade treat that’s customized just for you.
Related topics:


