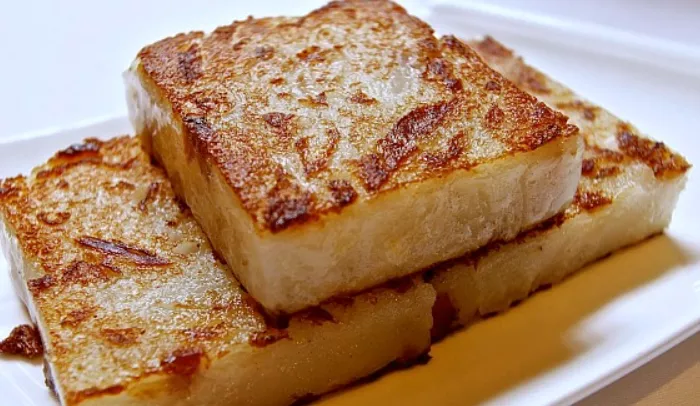
Graham cake is a delightful and versatile dessert that combines the warm, comforting flavors of graham crackers with a moist and tender cake-like texture. It can be enjoyed on its own, paired with a cup of coffee or tea, or even dressed up with various toppings and fillings for special occasions. Whether you’re a novice baker or an experienced home cook looking to expand your repertoire, this article will guide you through the detailed process of preparing a delicious graham cake from start to finish. We’ll cover everything from gathering the essential ingredients and tools to mastering each step of the production process, troubleshooting common issues that may arise, and exploring creative variations to make this classic treat truly your own.
Step 1: Preparing the Graham Cracker Crust (Optional)
Crushing the Graham Crackers: If you’ve decided to include a graham cracker crust in your graham cake, start by crushing the graham crackers. If using a food processor, place the graham crackers in the processor bowl and pulse until they are reduced to fine crumbs. If using the ziplock bag and rolling pin method, put the graham crackers in the bag, seal it tightly, and then use the rolling pin to roll over the bag, pressing and rolling until you achieve a crumbly texture. Aim for about 2 to 3 cups of crumbs depending on the size of your baking pan.
Mixing with Butter: Transfer the graham cracker crumbs to one of the mixing bowls. Add the melted butter (about 1/4 to 1/2 cup). Use a fork or a spatula to stir the crumbs and butter together until the crumbs are evenly coated with the butter. The mixture should start to hold together when you press it between your fingers. If it seems too dry, you can add a bit more melted butter, a tablespoon at a time, until the right consistency is achieved.
Pressing into the Pan: Pour the graham cracker crumb mixture into the greased baking pan. Use the back of a spoon or your hands (washed thoroughly) to press the crumbs firmly and evenly into the bottom of the pan. If you want the crust to come up the sides of the pan a bit, you can press it about 1 to 1 1/2 inches up the sides. Make sure the crust is compact and has an even thickness all around. Place the pan in the refrigerator while you prepare the cake batter to allow the crust to set slightly.
Step 2: Making the Cake Batter
Creaming the Butter and Sugar: In the other large mixing bowl, place the softened butter (about 1/2 to 1 cup). Use the electric mixer or hand whisk to beat the butter until it’s smooth and creamy. This usually takes a few minutes. Gradually add the sugar (about 1/2 to 3/4 cup) while continuing to mix on medium speed. Keep beating until the mixture becomes light and fluffy. This step incorporates air into the batter, which will help the cake rise and give it a nice texture. You’ll notice the color of the mixture change to a paler shade as you mix.
Adding the Eggs: Break the eggs (2 to 4 eggs) into a separate small bowl and whisk them lightly with a fork just to break them up. Then, gradually add the beaten eggs to the butter and sugar mixture while the mixer is running on low speed. Add the eggs one at a time, mixing well after each addition. This helps prevent the batter from curdling. If the batter does start to look curdled, don’t worry too much; it will usually come together as you continue to mix in the other ingredients.
Incorporating the Dry Ingredients: In a separate small bowl, sift together the flour (about 1/2 to 1 cup), baking powder (about 1 to 2 teaspoons), and salt (about 1/4 to 1/2 teaspoon). Gradually add the sifted dry ingredients to the batter while the mixer is running on low speed. Mix until the dry ingredients are just incorporated. Be careful not to overmix at this stage as it can make the cake tough.
Adding the Milk: Slowly pour in the milk (about 1/2 to 3/4 cup) while the mixer is still on low speed. Keep mixing until the milk is completely blended into the batter and the batter has a smooth and pourable consistency. If you’re adding any optional ingredients like vanilla extract, cinnamon, nuts, or chocolate chips, now is the time to do it. Add them and mix gently until they’re evenly distributed throughout the batter.
Step 3: Pouring the Batter into the Pan
Transferring the Batter: Once the cake batter is ready, carefully pour it into the baking pan with the prepared graham cracker crust (if you made one). If you didn’t make a crust, simply pour the batter into the greased pan. Use the spatula to spread the batter evenly, making sure it reaches all corners of the pan and has a consistent thickness throughout. Try to smooth the top of the batter as much as possible to give the cake a nice, even appearance when it’s baked.
Tapping the Pan: Gently tap the baking pan on the counter a few times to release any air bubbles that might be trapped in the batter. This helps ensure that the cake bakes evenly and doesn’t have any holes or uneven spots in the texture.
Step 4: Baking the Graham Cake
Preheating the Oven: Before baking, make sure your oven is preheated to the appropriate temperature, usually between 350°F to 375°F (177°C to 190°C). Place the baking pan with the cake batter in the center of the preheated oven. The middle rack usually provides the most even heat distribution, which is important for ensuring that the cake bakes evenly on both the top and bottom.
Baking Time: Bake the graham cake for about 25 to 40 minutes, depending on your oven and the thickness of the cake. You can check if the cake is done by inserting a toothpick or a thin knife into the center of the cake. If it comes out clean or with just a few crumbs attached, the cake is ready. The edges of the cake will also start to pull away slightly from the sides of the pan, and the top will be a nice golden brown color. Avoid opening the oven door too frequently during baking as this can cause fluctuations in temperature and affect the baking process.
Monitoring the Baking Process: Keep an eye on the cake as it bakes. Every oven is different, and you may need to adjust the baking time slightly. If the top of the cake starts to brown too quickly before the center is cooked through, you can cover the pan loosely with a piece of aluminum foil to prevent it from over-browning. On the other hand, if the cake isn’t browning enough after the estimated baking time, you can leave it in the oven for a few more minutes, checking every couple of minutes until it reaches the desired golden color.
Step 5: Cooling the Graham Cake
Initial Cooling: Once the graham cake is done baking, turn off the oven and leave the cake in the oven with the door slightly ajar for about 5 to 10 minutes. This gradual cooling helps prevent the cake from cracking due to sudden temperature changes. Then, carefully remove the baking pan from the oven and place it on a wire cooling rack.
Final Cooling: Let the cake cool completely at room temperature. This can take an hour or two, depending on the size of the cake. Resist the temptation to cut into the cake immediately as it needs this time to set properly. Once it’s cooled to room temperature, you can store it or proceed to add any toppings or fillings if you wish.
Step 6: Removing the Cake from the Pan (if applicable)
Loosening the Edges: If you made a graham cracker crust or if the cake has a tendency to stick to the sides of the pan, use a thin knife or an offset spatula to gently loosen the edges of the cake from the pan. Run the knife or spatula along the inside edge of the pan, being careful not to scratch the pan or damage the cake.
Inverting the Cake: Place a plate or a cake board on top of the baking pan. Carefully flip the pan and the plate together so that the cake comes out onto the plate. If you used parchment paper to line the bottom of the pan, it will make this process even easier. If the cake doesn’t come out cleanly, you can gently tap the bottom of the pan or use the knife or spatula to help loosen it further.
Step 7: Serving and Storing the Graham Cake
Serving: Once the cake is cooled and removed from the pan (if desired), you can cut it into slices using a sharp knife. To make clean cuts, dip the knife in hot water and wipe it dry between each slice. Serve the graham cake on its own or with your favorite accompaniments. It pairs well with a dollop of whipped cream, a scoop of ice cream, or a drizzle of chocolate sauce or fruit preserves.
Storing: If you’re not serving the entire cake at once, you can store it in an airtight container at room temperature for a day or two. For longer storage or in a warmer climate, it’s best to store it in the refrigerator, where it can stay fresh for up to a week. You can also freeze the cake for up to a few months. Wrap it well in plastic wrap and then place it in a freezer bag or an airtight container. Thaw it in the refrigerator before serving.
Conclusion
In conclusion, preparing a Graham Cake is a delightful and rewarding culinary experience that combines the classic taste of graham crackers with the rich, moist texture of a traditional cake. By following a simple recipe and paying attention to detail, you can create a delicious and visually appealing Graham Cake that will impress your friends and family.
Related Topics:


