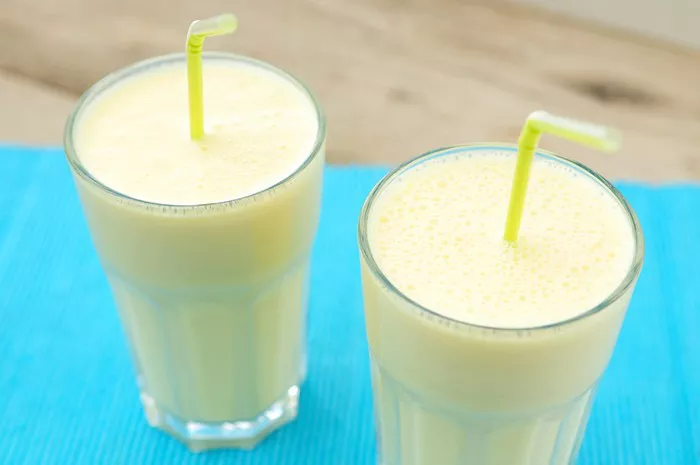
Making a good cup of cocoa is an art form that can warm your soul and delight your taste buds. Whether you prefer a rich, creamy hot cocoa or a light, refreshing cold cocoa, the key to a perfect cup lies in understanding the basics and experimenting with different ingredients and techniques. In this article, we’ll guide you through every step of the process, from selecting the best ingredients to brewing and flavoring your cocoa. Let’s dive in!
Choosing the Right Ingredients
Cocoa Powder
The foundation of any good cup of cocoa is quality cocoa powder. There are two main types: natural cocoa powder and Dutch-processed cocoa powder.
Natural Cocoa Powder: This type has a more acidic and intense chocolate flavor. It’s often used in baking recipes that call for baking soda, as the acidity helps the baking soda rise. For hot cocoa, natural cocoa powder can provide a bold, authentic chocolate taste.
Dutch-Processed Cocoa Powder: This cocoa powder has been treated with an alkalizing agent, which reduces its acidity and gives it a smoother, milder flavor. It’s better suited for recipes that use baking powder instead of baking soda. For hot cocoa, Dutch-processed cocoa can create a creamier, more velvety texture.
Milk or Dairy Alternatives
The type of milk you use will significantly impact the taste and texture of your cocoa.
Whole Milk: This provides a rich, creamy texture and a slightly sweet flavor. It’s a classic choice for hot cocoa.
Skim Milk: For a lighter option, skim milk works well but may result in a thinner consistency.
Non-Dairy Alternatives: Options like almond milk, oat milk, soy milk, or coconut milk can be delicious, especially if you have dietary restrictions or preferences. They can also add unique flavors to your cocoa.
Sugar
Sugar helps balance the bitterness of the cocoa powder and enhances the overall sweetness. You can use granulated sugar, brown sugar, or even honey or maple syrup for a different flavor profile.
Vanilla and Spices
Adding a touch of vanilla extract or vanilla bean can elevate your cocoa to the next level. Cinnamon, nutmeg, or a pinch of cayenne pepper can also add complexity and warmth.
Whipped Cream or Marshmallows
These are optional toppings, but they can make your cocoa feel more indulgent. Whipped cream adds a creamy, light texture, while marshmallows provide a sweet, chewy contrast.
Equipment You’ll Need
To make a great cup of cocoa, you don’t need fancy equipment. However, having the right tools can make the process easier and more enjoyable.
Saucepan
A medium-sized saucepan is essential for heating your cocoa mixture.
Whisk
A whisk is great for mixing and ensuring that your cocoa powder is fully incorporated into the milk without lumps.
Measuring Cups and Spoons
Accuracy in measuring ingredients is key to achieving the perfect balance of flavors.
Mugs
Choose mugs that are heatproof and have a handle for easy sipping.
Microwave (Optional)
If you prefer a quicker method, a microwave can be used instead of a stove.
Step-by-Step Guide to Making Hot Cocoa
Basic Hot Cocoa Recipe
Ingredients:
- 2 tablespoons cocoa powder (either natural or Dutch-processed)
- 1/4 cup granulated sugar (or to taste)
- 1 1/2 cups milk (or your chosen dairy alternative)
- 1/2 teaspoon vanilla extract
- Pinch of salt (optional, but enhances flavor)
- Whipped cream or marshmallows for topping (optional)
Instructions:
Combine Dry Ingredients: In a medium saucepan, whisk together the cocoa powder, sugar, and salt until well combined. This ensures that the cocoa powder is evenly distributed and helps prevent lumps.
Heat Milk: Gradually pour in the milk, whisking constantly to prevent the cocoa mixture from burning or sticking to the bottom of the pan.
Simmer: Cook over medium heat, stirring frequently, until the mixture is hot and steaming. Be careful not to let it boil, as this can curdle the milk and make the cocoa taste burnt.
Add Vanilla: Once the cocoa mixture is hot, remove it from the heat and stir in the vanilla extract. This adds a layer of depth and complexity to the flavor.
Serve: Pour the hot cocoa into mugs and enjoy immediately. If desired, top with whipped cream or marshmallows.
Tips for Perfecting Your Hot Cocoa
Adjust Sweetness: Taste your cocoa as you go and adjust the sugar level to your preference. If you prefer a less sweet cocoa, you can reduce the sugar.
Use High-Quality Ingredients: Investing in good-quality cocoa powder and milk will make a noticeable difference in the final taste.
Experiment with Extracts: Besides vanilla, you can try adding almond, peppermint, or orange extract for unique flavors.
Add a Dash of Coffee or Espresso: For an adult twist, add a small amount of espresso powder or a shot of cold coffee to your cocoa mixture. This enhances the chocolate flavor and adds a depth that’s hard to resist.
Microwave Method: For a quicker version, combine cocoa powder, sugar, and a small amount of milk in a microwave-safe mug. Stir until smooth, then add the remaining milk. Microwave on high until hot, stirring halfway through. Be cautious of splatters and hot spots.
Making Cold Cocoa
Cold cocoa is a refreshing alternative to hot cocoa, especially during warmer weather. Here’s how to make it:
Basic Cold Cocoa Recipe
Ingredients:
- 2 tablespoons cocoa powder (either natural or Dutch-processed)
- 1/4 cup granulated sugar (or to taste)
- 2 cups cold milk (or your chosen dairy alternative)
- 1/2 teaspoon vanilla extract
- Pinch of salt (optional)
- Ice cubes
- Whipped cream or marshmallows for topping (optional)
Instructions:
Combine Dry Ingredients:In a large pitcher or blender, whisk together the cocoa powder, sugar, and salt until well combined.
Add Milk: Pour in the cold milk and vanilla extract. Blend or whisk until smooth and well combined.
Chill: If you prefer your cocoa very cold, refrigerate the mixture for at least 30 minutes before serving.
Serve: Pour the cold cocoa over ice cubes in glasses. Add whipped cream or marshmallows if desired.
Tips for Perfecting Your Cold Cocoa
Use Cold Ingredients: Ensure your milk and any other liquid ingredients are cold before mixing to speed up the chilling process.
Add a Splash of Cream: For a richer texture, add a splash of heavy cream or half-and-half to your cold cocoa.
Use a Blender: Blending the cocoa mixture creates a smoother, silkier texture.
Infuse with Flavor: Try steeping a vanilla bean, a cinnamon stick, or a few peppercorns in the cold cocoa mixture before refrigerating. Remove the infused ingredients before serving.
Toppings Galore: Experiment with different toppings such as chopped nuts, chocolate shavings, or a drizzle of caramel sauce.
Adding Personal Touches
Spices and Extracts
Adding spices like cinnamon, nutmeg, or cardamom can create a warm, festive feeling. Extracts like almond, raspberry, or peppermint can offer unique twists on traditional cocoa.
Whipped Cream Variations
Upgrade your whipped cream by adding a touch of cocoa powder, cinnamon, or a drizzle of honey. You can also make a stabilized whipped cream with a bit of powdered sugar and cornstarch for longer-lasting peaks.
Marshmallow Flavors
Mini marshmallows are classic, but you can use flavored marshmallows like chocolate, vanilla, or strawberry to add an extra layer of flavor.
Chocolate Chips or Shavings
Adding a handful of chocolate chips or a few shavings of high-quality chocolate can make your cocoa feel extra indulgent.
Mix-Ins
Consider adding mix-ins like crushed candy canes, chopped nuts, dried fruit, or a spoonful of peanut butter. These additions can make your cocoa feel like a complete dessert in a mug.
Conclusion
Making a good cup of cocoa is a simple pleasure that can be tailored to suit your personal taste preferences. By choosing quality ingredients, using the right equipment, and following a few key steps, you can create a cup of cocoa that’s as comforting as it is delicious. Whether you prefer hot cocoa on a cold winter day or cold cocoa on a warm summer evening, the possibilities for flavor combinations and toppings are endless. Experiment, enjoy, and savor each sip as a moment of self-care and indulgence.
Related Topics:


