Hot cocoa bombs have become a popular treat, especially during the colder months. They are fun to make and even more fun to enjoy. When you drop them into hot milk, they melt, releasing a delicious mix of chocolate and cocoa powder. If you’ve never made them before, don’t worry! This article will guide you step by step through the process of making your very own hot cocoa bombs.
What Are Hot Cocoa Bombs?
Hot cocoa bombs are small, spherical chocolate shells filled with cocoa powder, marshmallows, and other fun additions. When you drop the bomb into a cup of hot milk, the chocolate shell melts away, and everything inside is released, making a rich and creamy cup of hot cocoa.
The best part is that you can customize your hot cocoa bombs to suit your taste. You can add different flavors, fillings, and toppings. This makes them a perfect gift idea or a fun project to do with family and friends.
What You Need to Make Hot Cocoa Bombs
Before you start making your hot cocoa bombs, gather the following ingredients and tools:
Ingredients:
Good-quality chocolate (milk, dark, or white chocolate)
Hot cocoa mix (choose your favorite, or make your own)
Mini marshmallows (or any other filling you like)
Sprinkles, candy canes, or other decorations (optional)
Flavoring extracts (like vanilla, peppermint, or hazelnut – optional)
Tools:
Silicone mold (usually used for spherical or dome-shaped molds)
Microwave-safe bowl (for melting the chocolate)
Spoon or spatula (for stirring the chocolate)
Small spoon or pipette (for adding the cocoa powder and marshmallows)
Parchment paper or wax paper (to set your cocoa bombs on while they cool)
Step-by-Step Guide to Making Hot Cocoa Bombs
Now that you have everything ready, let’s dive into making hot cocoa bombs. Follow these easy steps to create your own delicious treats.
1. Melt the Chocolate
The first step in making hot cocoa bombs is to melt the chocolate. You want to use a good-quality chocolate that will melt smoothly. You can use milk chocolate, dark chocolate, or even white chocolate, depending on your preference.
How to Melt Chocolate:
- Break the chocolate into small pieces or use chocolate chips.
- Place the chocolate in a microwave-safe bowl.
- Microwave the chocolate in 20-second intervals, stirring each time until it’s fully melted. Be careful not to overheat the chocolate, as it can burn.
Alternatively, you can use a double boiler to melt the chocolate if you prefer.
2. Coat the Molds with Chocolate
Once the chocolate is melted, you need to coat the inside of your silicone molds. The key here is to create a thick enough layer of chocolate that it will hold the cocoa powder and marshmallows.
How to Coat the Molds:
- Using a spoon or a small spatula, scoop some melted chocolate into the mold.
- Spread the chocolate evenly along the sides of the mold, making sure to cover every part of the inside. You can also dip a pastry brush into the melted chocolate and brush it into the mold for a more precise coating.
- Once the molds are fully coated, place them in the fridge for about 10-15 minutes to let the chocolate harden.
If you want an extra-thick shell, you can repeat the process and add a second layer of chocolate after the first one has set.
3. Fill the Cocoa Bombs
After the chocolate shell has hardened, it’s time to fill the bombs with hot cocoa mix and marshmallows. You can also add any other ingredients you like, such as crushed candy canes, sprinkles, or flavored extracts.
How to Fill the Cocoa Bombs:
- Take the chocolate-coated molds out of the fridge and gently pop the chocolate halves out of the mold.
- Place one of the chocolate halves on a clean surface, like parchment paper.
- Spoon in a heaping spoonful of hot cocoa mix into the center.
- Add a few mini marshmallows (or your chosen filling).
- If you want to add a fun twist, sprinkle in some crushed candy canes, chocolate chips, or flavored extracts.
4. Seal the Cocoa Bombs
Now that your cocoa bombs are filled, it’s time to seal them. The easiest way to do this is by using a second half of the chocolate shell and melting the edges slightly to attach it to the filled half.
How to Seal the Cocoa Bombs:
- Heat a clean pan on the stove over low heat.
- Take one of the empty chocolate halves and gently press the open edge against the warm pan for a few seconds. The heat from the pan will slightly melt the edge.
- Quickly press the melted edge onto the filled half, sealing the cocoa bomb.
- Repeat with all the cocoa bombs, making sure each one is securely sealed.
5. Decorate the Cocoa Bombs
After sealing the cocoa bombs, you can decorate them to make them extra special. This is where the fun begins! You can add sprinkles, chocolate drizzle, or even a dusting of edible glitter for a festive look.
How to Decorate:
- Melt a little extra chocolate and drizzle it over the top of the sealed cocoa bomb.
- Add colorful sprinkles, crushed candy canes, or small chocolate chips for texture.
- If you’re feeling creative, you can pipe melted chocolate into fun designs on top.
6. Chill the Cocoa Bombs
Once your cocoa bombs are decorated, place them in the fridge for about 10-15 minutes to ensure that the chocolate sets properly and everything stays in place.
7. How to Use Hot Cocoa Bombs
Now that your cocoa bombs are ready, it’s time to enjoy them! To make your hot cocoa:
- Heat up a cup of milk (about 8 oz) on the stove or in the microwave.
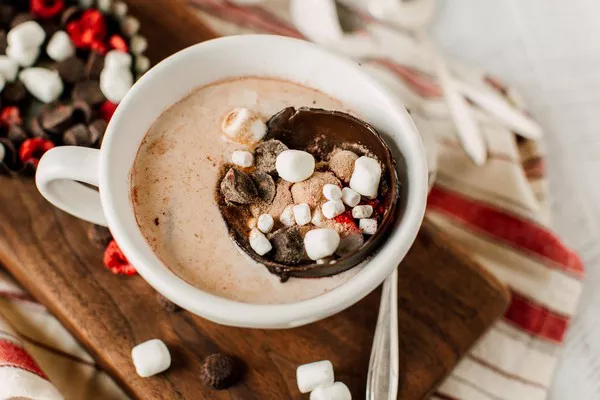
- Drop the cocoa bomb into the hot milk.
- Watch as the chocolate shell melts away, releasing the cocoa powder and marshmallows inside.
- Stir the contents of the cup to mix everything together and enjoy your creamy, delicious hot cocoa!
Tips and Tricks for Perfect Hot Cocoa Bombs
Use the right chocolate: High-quality chocolate will give your cocoa bombs a rich and smooth taste. Avoid using chocolate chips that contain stabilizers, as they don’t melt as well.
Don’t overfill: Be careful not to overfill the cocoa bombs, as this can make it difficult to seal them properly.
Seal properly: Make sure the chocolate shells are sealed tightly to prevent any cocoa powder from spilling out.
Customize your fillings: Don’t be afraid to get creative with your fillings. You can add flavored cocoa mixes, peppermint extract, or even caramel bits for a unique twist.
Why Are Hot Cocoa Bombs So Popular?
Hot cocoa bombs are not just about the taste—they’re also a fun and interactive experience. The excitement of watching the chocolate shell melt away and seeing the ingredients reveal themselves is part of the magic. They also make great gifts for the holidays, birthdays, or any special occasion. And because they’re so customizable, you can tailor them to anyone’s preferences, making them a personal and thoughtful treat.
Final Thoughts
Making hot cocoa bombs is a fun and simple way to create a delicious treat that will impress your friends and family. The process is easy to follow, and the results are worth it. Whether you’re making them for yourself or as a gift, these cocoa bombs are a fun and tasty way to enjoy hot chocolate like never before.
So, grab your ingredients, get your molds, and start making these delightful cocoa bombs. With a little creativity, you’ll have a batch of homemade hot cocoa bombs that will melt your heart!
Related topics