Cocoa bombs are a fun and delicious treat that has become popular in recent years. They’re perfect for warming up on a cold day, offering a rich and creamy cup of hot cocoa with a surprise inside. Making cocoa bombs with plastic molds is an easy and enjoyable process. If you are new to making cocoa bombs, don’t worry! This article will guide you step by step through the process.
What Are Cocoa Bombs?
Cocoa bombs are spherical shells made of chocolate, filled with hot cocoa mix, marshmallows, and other fun toppings. When hot milk is poured over the cocoa bomb, it melts, revealing the cocoa mix and marshmallows inside. The result is a delicious, indulgent hot cocoa drink.
Plastic molds are a great tool to use for making these cocoa bombs. They are affordable, reusable, and come in various sizes and shapes. The process is simple, and with the right ingredients and a bit of patience, you can make your own cocoa bombs in no time.
What You Need to Make Cocoa Bombs
Before you begin, gather all the necessary ingredients and tools. Here’s a list of what you will need:
Ingredients:
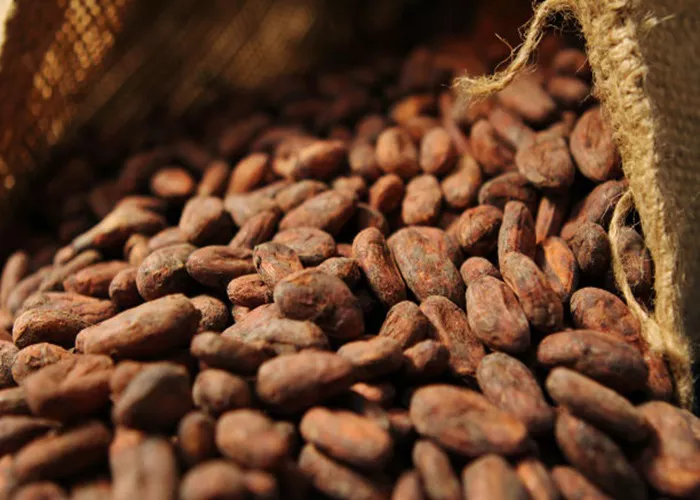
Chocolate (milk, dark, or white): This will form the shell of the cocoa bomb.
Hot cocoa mix: Use your favorite hot cocoa powder, or make your own.
Mini marshmallows: These will go inside the cocoa bomb for extra flavor and fun.
Optional extras: Crushed candy canes, sprinkles, or flavored syrups can also be added for extra flair.
Tools:
Plastic cocoa bomb molds: You can find these molds online or at craft stores. The most common shape is the sphere, but there are also heart, star, and other fun shapes available.
Microwave-safe bowl: This is for melting the chocolate.
Spoon or spatula: To spread the melted chocolate into the molds.
Hot water or a small saucepan: To seal the cocoa bombs.
Piping bag (optional): If you want to decorate or add extra designs.
Step-by-Step Instructions for Making Cocoa Bombs
Step 1: Prepare Your Plastic Molds
The first step is to prepare your plastic molds. Ensure the molds are clean and dry before use. If they’re not properly cleaned, the chocolate may not set properly. Once they’re ready, place them on a flat surface to prevent any spills.
Step 2: Melt the Chocolate
Next, you need to melt the chocolate to form the cocoa bomb shells. Break your chocolate into small pieces and place it in a microwave-safe bowl. Heat it in 30-second intervals, stirring between each session until the chocolate is completely melted. You can also melt the chocolate using a double boiler if you prefer.
Make sure not to overheat the chocolate, as it could burn. Once it’s smooth and glossy, it’s ready to use.
Step 3: Coat the Molds with Chocolate
Using a spoon or spatula, spoon the melted chocolate into the plastic molds. Be sure to coat the inside of the mold evenly. Start with a small amount of chocolate and spread it around the edges of the mold to create a thick coating. This is important because a thicker shell will hold up better when you fill it with the cocoa mix and marshmallows.
If needed, use the back of the spoon or spatula to smooth the chocolate into the corners of the mold, ensuring an even layer. Once the inside of each mold is covered, place the molds in the refrigerator for about 10 minutes to set the chocolate.
Step 4: Apply a Second Coat of Chocolate
After the first layer of chocolate has set, take the molds out of the refrigerator. If the chocolate has become firm, it’s time to apply a second coat. This will help ensure the cocoa bomb shell is strong and won’t break apart easily.
Apply the second coat of melted chocolate in the same way you did the first. Make sure to cover all areas evenly, and then return the molds to the refrigerator to chill for an additional 10 minutes.
Step 5: Remove the Cocoa Bombs from the Molds
Once the chocolate has completely set, carefully remove the cocoa bomb shells from the plastic molds. Gently press on the edges of the mold to release the chocolate sphere. Be cautious during this step to avoid cracking the chocolate.
If any of the shells are uneven or cracked, don’t worry! You can easily fix them in the next steps.
Step 6: Fill the Cocoa Bombs
Now it’s time to fill your cocoa bombs with the delicious ingredients. Start by spooning hot cocoa mix into the center of one half of the chocolate sphere. Add about one to two tablespoons of cocoa mix, depending on how strong you want the flavor.
Afterward, drop in a few mini marshmallows. You can also add other fun toppings, such as crushed candy canes, sprinkles, or flavored syrup, for an extra treat. The key is not to overfill the cocoa bomb so that it can close properly.
Step 7: Seal the Cocoa Bombs
To seal the cocoa bomb, heat a small plate or skillet over low heat. Place the empty half of the cocoa bomb shell onto the warm surface for just a few seconds. This will slightly melt the edge, making it easier to attach the other half of the cocoa bomb.
Once the edge has softened, carefully press the filled half and the empty half together. Hold them for a few seconds to ensure they stick. If necessary, use a small amount of melted chocolate around the seam to seal the two halves together completely.
Step 8: Decorate the Cocoa Bombs (Optional)
If you want to add a little extra flair to your cocoa bombs, now’s the time to decorate them. You can drizzle extra melted chocolate over the top, or use a piping bag to add fun designs. Sprinkles, edible glitter, or crushed candy canes are also great for decorating your cocoa bombs.
Let the decorations harden in the fridge for a few minutes before moving on to the next step.
Step 9: Store the Cocoa Bombs
Once your cocoa bombs are sealed and decorated, it’s important to store them properly to keep them fresh. Store them in an airtight container at room temperature. If you want to keep them for an extended period, you can refrigerate them. However, if you store them in the fridge, allow them to come to room temperature before serving, as the chocolate may harden too much when chilled.
How to Use Cocoa Bombs
To enjoy your cocoa bomb, simply place it in a mug. Heat up some milk (dairy or non-dairy) until it’s hot but not boiling. Pour the hot milk over the cocoa bomb, and watch as it melts and releases the cocoa mix and marshmallows inside. Stir, and enjoy your delicious cup of hot cocoa!
Tips for Making Perfect Cocoa Bombs
Use good-quality chocolate: The quality of chocolate you use will affect the taste and texture of your cocoa bomb. Choose a chocolate that melts smoothly for the best results.
Don’t overfill the molds: When adding the cocoa mix and toppings, be sure not to overfill the molds. This will ensure the cocoa bombs seal correctly.
Let the chocolate cool completely: Make sure the chocolate has set fully before removing it from the mold or attempting to seal the two halves together.
Experiment with flavors: You can experiment with different hot cocoa flavors by adding flavored syrups, spices, or even flavored chocolate.
Have fun with decorations: Decorating your cocoa bombs is one of the best parts. Get creative with your designs!
Conclusion
Making cocoa bombs with plastic molds is a simple and fun process that allows you to create a delicious and visually appealing treat. With just a few ingredients and some patience, you can craft beautiful, personalized cocoa bombs that are perfect for gift-giving or cozying up with a warm drink. Enjoy the process and the delicious results!
Related topics