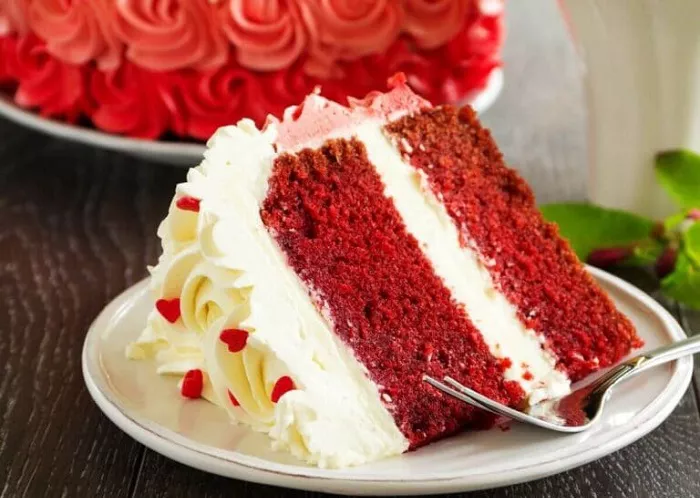
Red velvet cake is a timeless dessert that combines rich cocoa flavor, a striking crimson hue, and a luxurious cream cheese frosting. Its velvety texture and balanced sweetness have made it a favorite for celebrations and everyday indulgences alike. But what makes this cake so special? In this article, we’ll explore the history, science, and techniques behind crafting the perfect red velvet cake, ensuring your creation stands out in both flavor and presentation.
The History of Red Velvet Cake
To appreciate red velvet cake, it’s essential to understand its origins. The cake’s roots trace back to the Victorian era, when “velvet” cakes—named for their fine, tender crumb—gained popularity. These cakes often used almond flour or cornstarch to soften the texture.
The modern red velvet cake emerged in the early 20th century, thanks to the interaction between natural cocoa powder (which contains acid) and buttermilk. This reaction created a subtle reddish tint, which was later amplified by food coloring. During World War II, bakers used beet juice to enhance the color due to food rationing. However, the cake’s iconic bright red shade became mainstream in the 1940s and 1950s, popularized by the Adams Extract Company in Texas.
Today, red velvet cake symbolizes Southern hospitality and is a staple at weddings, holidays, and upscale bakeries.
Essential Ingredients and Their Roles
A flawless red velvet cake relies on precise ingredient selection. Here’s a breakdown of the key components and their culinary purposes:
Cocoa Powder
Use natural, unsweetened cocoa powder (not Dutch-processed). Natural cocoa is acidic, which reacts with baking soda to leaven the cake and enhance its reddish hue.
Buttermilk
Buttermilk’s acidity tenderizes gluten, ensuring a moist, soft crumb. It also reacts with cocoa and baking soda to deepen the cake’s color.
Vinegar
A small amount of white vinegar boosts acidity, intensifying the reaction with baking soda for better rise and color development.
Food Coloring
While traditional recipes relied on chemical reactions for color, modern versions use liquid or gel food coloring. Gel coloring is preferred for its vibrancy without altering the batter’s consistency.
Cream Cheese Frosting
The tangy sweetness of cream cheese frosting balances the cake’s richness. Quality cream cheese and butter are non-negotiable for a smooth, creamy texture.
Oil vs. Butter
Many recipes use a mix of butter (for flavor) and oil (for moisture). Oil’s fat molecules coat flour proteins, resulting in a softer crumb.
Step-by-Step Instructions for Red Velvet Cake
Ingredients
For the cake:
- 2½ cups (300g) all-purpose flour
- 1½ cups (300g) granulated sugar
- 1 tsp baking soda
- 1 tsp salt
- 2 tbsp natural cocoa powder
- 1½ cups (360ml) vegetable oil
- 1 cup (240ml) buttermilk, room temperature
- 2 large eggs, room temperature
- 2 tbsp red food coloring (gel)
- 1 tsp vanilla extract
- 1 tsp white vinegar
For the frosting:
- 8 oz (226g) cream cheese, softened
- ½ cup (113g) unsalted butter, softened
- 4 cups (480g) powdered sugar
- 1 tsp vanilla extract
- Pinch of salt
Method
Prep Work
Preheat the oven to 350°F (175°C). Grease and line three 8-inch cake pans with parchment paper. Room-temperature ingredients ensure even mixing.
Combine Dry Ingredients
In a bowl, sift together flour, cocoa powder, baking soda, and salt. Sifting prevents lumps and aerates the mixture for a lighter texture.
Mix Wet Ingredients
In a separate bowl, whisk oil, sugar, buttermilk, eggs, food coloring, vanilla, and vinegar. The vinegar will react with the baking soda later—do not skip this step.
Combine Wet and Dry Mixtures
Gradually add the dry ingredients to the wet, mixing until just combined. Overmixing develops gluten, leading to a dense cake.
Bake
Divide the batter evenly into the pans. Bake for 25–30 minutes, or until a toothpick inserted into the center comes out clean. Let the cakes cool completely before frosting.
Make the Frosting
Beat cream cheese and butter until smooth. Gradually add powdered sugar, vanilla, and salt. Whip for 3–4 minutes until fluffy.
Assemble the Cake
Place one layer on a serving plate. Spread frosting evenly, then repeat with remaining layers. Frost the top and sides. For a professional finish, use a bench scraper or offset spatula.
Common Mistakes and How to Avoid Them
Using Dutch-Processed Cocoa
Dutch-processed cocoa is neutralized, meaning it won’t react with baking soda. Stick to natural cocoa for the signature rise and color.
Overbaking
Overbaked cakes lose moisture. Check for doneness a few minutes early—the edges should pull away slightly from the pan.
Skipping the Vinegar
Vinegar is crucial for activating the baking soda. Without it, the cake will be pale and dense.
Cold Ingredients
Cold buttermilk or eggs can cause the batter to curdle. Always bring ingredients to room temperature.
Overloading with Food Coloring
Too much liquid coloring can make the batter bitter. Gel coloring provides intense color without excess moisture.
Pairing and Serving Suggestions
Red velvet cake pairs beautifully with:
Coffee or espresso: The bitterness contrasts the cake’s sweetness.
Fresh berries: Raspberries or strawberries add a tart contrast.
Champagne: Ideal for celebrations, as the bubbles cut through the frosting’s richness.
For a modern twist, try serving mini layered cakes or cupcakes. Garnish with edible gold leaf or cocoa nibs for elegance.
The Science Behind the Velvet Texture
The “velvet” in red velvet cake comes from two key factors:
Acid-Based Leavening: The reaction between buttermilk, vinegar, and baking soda produces carbon dioxide bubbles, creating a fine, airy crumb.
Oil Content: Oil’s liquid state at room temperature coats flour proteins more evenly than butter, inhibiting gluten formation.
Additionally, the Maillard reaction (a chemical process between amino acids and sugars) during baking contributes to the cake’s delicate crust.
Conclusion
Mastering red velvet cake requires attention to detail, from selecting the right cocoa to balancing acidity and moisture. By understanding the chemistry behind its iconic color and texture, you can elevate this classic dessert into a showstopping masterpiece. Whether you’re baking for a special occasion or simply indulging a craving, this recipe—rooted in tradition and refined with modern techniques—will never disappoint.
Remember, great baking is both an art and a science. Don’t hesitate to experiment with decorations or flavor infusions (think orange zest or a hint of espresso in the frosting). After all, the best recipes are those made with curiosity and joy. Happy baking!
Related topics:
How Do You Make Boxed Red Velvet Cake Better


