Preparing fresh pumpkin pie filling from scratch is a rewarding experience. It gives you a rich, flavorful base that can elevate your pie to new heights. If you’re ready to go beyond the canned version and create something homemade and delicious, this guide will walk you through every step. Let’s dive into how to prepare fresh pumpkin pie filling that will leave everyone asking for seconds.
Why Choose Fresh Pumpkin?
Using fresh pumpkin for your pie filling brings out a deeper, more natural flavor. Fresh pumpkin tends to be sweeter and creamier than canned pumpkin, giving your pie a rich, homemade taste. When using fresh pumpkin, you control the texture and flavor, which can make all the difference in your final product.
What You Need to Make Fresh Pumpkin Pie Filling
Before you start, gather all the ingredients and tools you need. Here’s what you’ll need for the filling:
Ingredients:
- 1 medium-sized fresh pumpkin (about 3 to 4 pounds)
- 1 cup heavy cream or evaporated milk (or a combination of both)
- 2 large eggs
- 3/4 cup brown sugar (packed)
- 1/4 cup granulated sugar
- 1 teaspoon ground cinnamon
- 1/2 teaspoon ground nutmeg
- 1/2 teaspoon ground ginger
- 1/4 teaspoon ground cloves (optional)
- 1 teaspoon pure vanilla extract
- 1/4 teaspoon salt
Tools:
- A sharp knife
- A large spoon or scoop
- A baking sheet
- A food processor or blender (optional, but helpful for smoother filling)
- A large bowl
- A whisk
- A pie crust (store-bought or homemade)
- A 9-inch pie dish
Step 1: Choose the Right Pumpkin
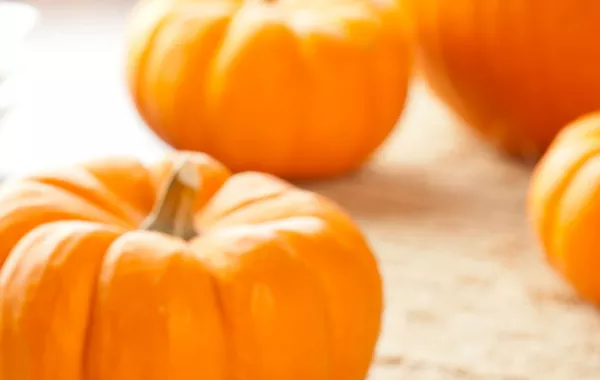
Not all pumpkins are the same. For pie filling, you’ll want a “sugar” or “pie” pumpkin. These pumpkins are smaller, denser, and sweeter compared to large carving pumpkins. Sugar pumpkins have a deep orange color and are perfect for baking.
Avoid carving pumpkins, as they tend to be watery and not as flavorful. The best choice is a small, round pumpkin labeled as “pie pumpkin” or “sugar pumpkin” at the store or farmer’s market.
Step 2: Prepare the Pumpkin
To begin, preheat your oven to 350°F (175°C). While the oven heats up, take your pumpkin and cut it in half. Use a sharp knife to carefully slice it. Remove the seeds and the stringy pulp with a spoon or scoop. You can save the seeds to roast later if you’d like!
Once the pumpkin is cleaned out, place the halves cut-side down on a baking sheet lined with parchment paper or aluminum foil. Roast the pumpkin halves in the preheated oven for about 45 minutes to 1 hour, or until the flesh is soft and a fork can easily be inserted into the skin.
Step 3: Scoop and Puree the Pumpkin
After the pumpkin has cooled enough to handle, scoop out the soft, tender flesh from the skin. Place the pumpkin flesh in a food processor or blender. Puree the pumpkin until it’s completely smooth. If you don’t have a food processor, you can mash it with a fork or potato masher, but this may result in a chunkier texture.
Once the pumpkin is pureed, measure out about 2 cups of pumpkin puree. If you have leftover puree, you can store it in an airtight container in the refrigerator for up to a week or freeze it for future use.
Step 4: Make the Pumpkin Pie Filling
Now that you have your fresh pumpkin puree ready, it’s time to turn it into pie filling.
In a large mixing bowl, combine the following ingredients:
- 2 cups fresh pumpkin puree
- 1 cup heavy cream (or a mix of heavy cream and evaporated milk)
- 2 large eggs
- 3/4 cup brown sugar (packed)
- 1/4 cup granulated sugar
- 1 teaspoon ground cinnamon
- 1/2 teaspoon ground nutmeg
- 1/2 teaspoon ground ginger
- 1/4 teaspoon ground cloves (optional)
- 1 teaspoon pure vanilla extract
- 1/4 teaspoon salt
Use a whisk to thoroughly combine everything. Whisk until the mixture is smooth and fully blended, ensuring there are no lumps of pumpkin puree or spices left behind.
Step 5: Prepare the Pie Crust
While the pie filling is coming together, you’ll need to prepare your pie crust. You can use a store-bought pie crust, but making your own from scratch can add even more flavor and texture to your pie.
If you’re using a store-bought pie crust, simply unroll it and press it into a 9-inch pie dish. If you’re making a homemade crust, follow the recipe to prepare and roll out the dough, then fit it into the pie dish.
Once your crust is in the pie dish, you can either chill it in the refrigerator for about 15 minutes or blind-bake it to ensure it stays crisp during baking. If blind baking, line the crust with parchment paper and fill it with pie weights or dried beans. Bake at 375°F (190°C) for about 15 minutes, then remove the parchment and weights and bake for an additional 5-10 minutes until golden.
Step 6: Pour the Filling into the Crust
Once your pie crust is ready and your filling is smooth, pour the pumpkin mixture into the crust. Use a spatula to evenly distribute the filling, ensuring it’s level. Gently tap the pie dish on the counter to remove any air bubbles.
Step 7: Bake the Pie
Preheat your oven to 350°F (175°C) again if it has cooled down. Place the pie in the oven and bake for 50-60 minutes. Keep an eye on it—toward the end of baking, the filling should be set but still slightly wobbly in the center.
To check if the pie is done, insert a knife or toothpick into the center. If it comes out clean or with just a few moist crumbs, your pie is ready. If it comes out wet, let the pie bake for a few more minutes.
Step 8: Cool the Pie
Once the pie is finished baking, remove it from the oven and allow it to cool on a wire rack for at least 2 hours. Cooling the pie is crucial because it helps the filling set completely. If you try to slice the pie before it has cooled, the filling may be too runny.
Step 9: Serve and Enjoy!
Once your pumpkin pie has cooled, it’s ready to serve. You can garnish it with freshly whipped cream, a sprinkle of cinnamon, or even a drizzle of caramel for extra sweetness.
Tips for Perfect Pumpkin Pie Filling
Freshness Matters: The quality of the pumpkin you use can make or break your pie. Make sure to choose a sugar pumpkin for the best results.
Adjust the Spices: You can adjust the spices based on your preference. If you like more cinnamon or nutmeg, feel free to add a little more. Just be careful not to overpower the pumpkin flavor.
Use Room Temperature Eggs: Make sure your eggs are at room temperature before adding them to the filling. This will help them incorporate more easily.
Blind Bake the Crust: If you’re concerned about a soggy crust, consider blind-baking it before adding the filling. This ensures the crust stays crisp.
Add a Little Salt: Don’t skip the salt in the filling. It helps balance the sweetness and enhances the flavors.
Conclusion
Making fresh pumpkin pie filling from scratch is a simple and satisfying process that results in a rich and flavorful dessert. By following these steps, you can create a pumpkin pie that stands out from the rest. Whether you’re preparing it for a holiday celebration or just a cozy family dessert, fresh pumpkin pie will never disappoint.
So, next time you’re craving pumpkin pie, skip the can and enjoy the full experience of making it with fresh ingredients.
Related topics


