Plum crumble is a delicious dessert that combines the sweet and tart flavors of plums with a buttery, crisp topping. To make the best plum crumble, it’s important to prepare the plums properly. The right preparation will ensure that the plums maintain their flavor and texture, creating a delightful contrast with the crumble topping. In this article, we’ll walk you through the steps for preparing plums for a crumble, from selecting the right plums to cutting, peeling, and seasoning them for the perfect dessert.
1. Choosing the Right Plums for Crumble
The first step in making a great plum crumble is selecting the right plums. While most varieties of plums can work for this recipe, the type of plum you choose can make a big difference in taste and texture.
Best Varieties of Plums for Crumble
The best plums for crumble are those that are slightly under-ripe, as they hold their shape better when baked. Here are a few varieties you can consider:
Italian Plums: Also known as prune plums, Italian plums have a sweet-tart flavor that works wonderfully in crumble recipes. They are oval-shaped and have a deep purple skin with a yellowish flesh.
Red Plums: These plums are juicy and slightly tart, making them perfect for desserts like crumble. Their flesh is a rich red color, and they have a slightly firmer texture.
Black Plums: Black plums are sweet and firm, and they also provide a nice contrast when paired with the crumble topping. They tend to be sweeter than the red and Italian plums.
Damson Plums: These small, tart plums are perfect for making desserts with a bit more tang. They work well in crumbles when you want a more tart, less sweet filling.
When selecting plums, choose fruit that is ripe but still firm. Overripe plums may turn mushy when baked, which can lead to a soggy crumble. Look for plums that yield slightly to gentle pressure, but do not feel mushy or overly soft.
Seasonal Considerations
Plums are typically in season from late summer to early fall. Depending on your location, you might be able to find fresh, locally grown plums at your farmer’s market during these months. While fresh plums are best, you can also use frozen plums if fresh ones are not available. Just be sure to thaw and drain the excess moisture before using them.
2. Preparing the Plums for Crumble
Once you’ve selected the best plums, it’s time to prepare them for your crumble. The preparation process involves washing, peeling, pitting, and cutting the plums to the right size for the filling.
Washing the Plums
Before you do anything else, wash the plums thoroughly under cool running water to remove any dirt or pesticides. Plums have a thin skin that can hold onto residue, so it’s important to wash them well. Once cleaned, pat them dry with a clean kitchen towel.
Peeling the Plums (Optional)
Many crumble recipes don’t require peeling the plums, as the skin adds color and texture to the dish. However, some people prefer to peel the plums to avoid the skin’s slightly chewy texture. If you choose to peel the plums, here’s how to do it:
Blanch the Plums: Bring a pot of water to a boil and prepare an ice bath in a separate bowl. Score a small “X” on the bottom of each plum.
Blanch the Plums: Place the plums into the boiling water for about 30 seconds to 1 minute. You’ll see the skin start to peel away from the fruit.
Cool the Plums: Immediately transfer the plums into the ice bath to stop the cooking process.
Peel the Skin: Once cooled, gently peel off the skin with your fingers or a knife.
If you’re using plums with thinner skins, like Italian plums, peeling might not be necessary. The skin will soften during baking, and many people enjoy its texture in the final dessert.
Pitting the Plums
After washing (and peeling, if desired), it’s time to pit the plums. This step is essential for preparing the fruit for a crumble, as the pits will not break down during baking.
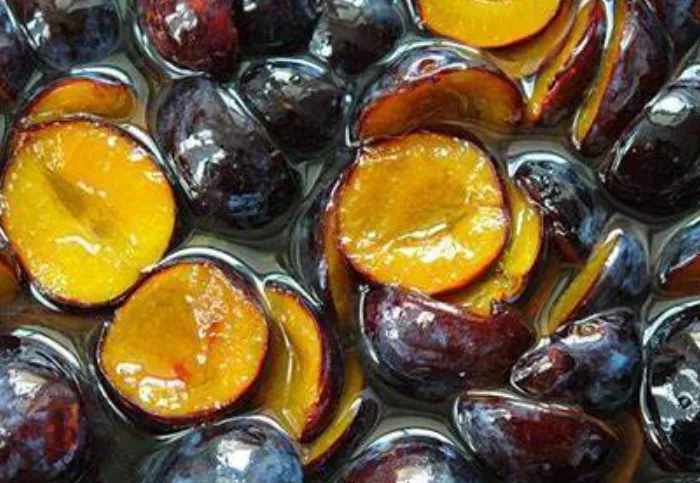
To pit the plums, use a sharp knife to cut each plum in half lengthwise. You should be able to easily separate the two halves with a gentle twist. Once the plum is halved, remove the pit with your fingers or by using a spoon. Be careful not to damage the flesh of the plum.
Cutting the Plums
Once the pits are removed, you’ll need to cut the plums into pieces that are the right size for your crumble. Aim for chunks that are about 1 to 1.5 inches in size. This size is ideal for creating a nice balance between the fruit and the crumble topping, ensuring the fruit cooks evenly without becoming too mushy.
For larger plums, you may want to cut each half into quarters. For smaller plums, halving them may be sufficient. The key is to create uniform pieces so that they bake evenly.
3. Seasoning the Plums for Crumble
To bring out the natural sweetness and tartness of the plums, it’s important to season them well. Adding sugar and spices can enhance the fruit’s flavor and help it caramelize during baking, which adds to the crumble’s deliciousness.
Sugar
Plums can range from very tart to quite sweet, so you’ll need to adjust the amount of sugar depending on the sweetness of your fruit. For a standard 4-5 cups of prepared plums, you can use about 1/4 to 1/2 cup of granulated sugar.
If you want to enhance the tartness of the plums, you can also use a tablespoon of lemon juice. The acidity will balance the sweetness of the fruit and create a more complex flavor profile.
Spices
Cinnamon is a classic spice to pair with plums. A teaspoon of ground cinnamon can bring out the warmth and sweetness of the fruit. For a more complex flavor, you can also add a pinch of ground nutmeg or ginger. These spices will complement the plum’s natural flavor and add depth to the crumble filling.
Cornstarch or Flour
To thicken the plum filling as it bakes, it’s a good idea to add a thickening agent. A tablespoon of cornstarch or flour mixed with the sugar and spices will help the juices released by the plums thicken into a nice syrupy consistency. This prevents the crumble from becoming too runny.
Optional Additions
For additional flavor, you can also add a splash of vanilla extract, a tablespoon of orange zest, or a few tablespoons of fruit preserves or jam. These ingredients can give the filling a rich, aromatic undertone and enhance the plum’s natural flavor.
4. Assembling the Crumble
Once your plums are prepared and seasoned, you can start assembling your crumble. This involves layering the plum filling in a baking dish and topping it with a crumble topping. The topping is made with a mixture of butter, flour, sugar, and oats that forms a golden, crispy texture when baked.
Layering the Plums
Place your prepared plums in a greased baking dish. You can use a 9×9-inch square dish or a similar-sized round dish. Spread the plums out evenly, making sure they cover the bottom of the dish. The plums should form a thick, even layer, as this will ensure they cook evenly and absorb all the flavors from the seasoning.
Adding the Crumble Topping
Once the plums are layered, it’s time to top them with the crumble mixture. The topping should be sprinkled evenly over the plums, covering them completely. Use your fingers to crumble the mixture into small clumps, which will form the signature crispy texture.
5. Baking the Plum Crumble
Preheat your oven to 375°F (190°C) and bake the crumble for 30-40 minutes, or until the topping is golden brown and the plum filling is bubbling. The juices from the plums should be thickened and syrupy, and the topping should be crispy and lightly browned.
If you find that the topping is browning too quickly while the filling is still cooking, you can cover the crumble with aluminum foil for the first 20 minutes of baking. This will allow the filling to cook without over-browning the topping.
6. Serving the Plum Crumble
Once your plum crumble is baked to perfection, let it cool for a few minutes before serving. The crumble can be served warm or at room temperature, depending on your preference. It’s best enjoyed with a scoop of vanilla ice cream, a dollop of whipped cream, or a drizzle of custard. The combination of warm, juicy plums and the crispy, buttery crumble topping is sure to be a hit with everyone.
Conclusion
Preparing plums for a crumble is an easy and enjoyable process that enhances the flavors and textures of this classic dessert. By selecting the right plums, properly preparing them, and seasoning them well, you’ll create a plum crumble that is perfectly balanced in flavor and texture. With these simple steps, you’ll be able to make a delicious, homemade plum crumble that’s sure to impress your family and friends.
Related topics