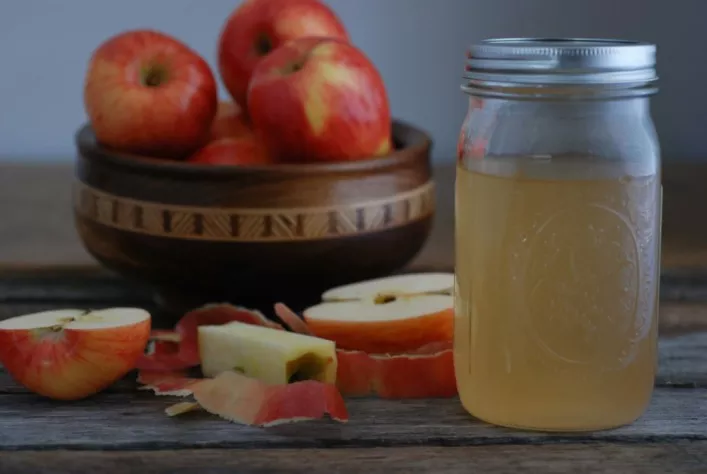
Apple and pear cider, often referred to as “hard cider,” is a delightful and refreshing beverage that combines the natural sweetness of apples with the subtle, crisp notes of pears. Making your own apple and pear cider at home can be a rewarding and enjoyable experience. In this comprehensive guide, we will walk you through the process of crafting this delectable drink, from selecting the right fruit to fermentation and bottling. By the end of this guide, you’ll have the knowledge and confidence to make your very own apple and pear cider.
Understanding Apple and Pear Cider
Apple and pear cider, also known as “perry” when it’s primarily made from pears, is an alcoholic beverage produced through the fermentation of apple and pear juice. The result is a slightly sweet, effervescent drink with a delightful fruitiness. The process of making cider at home allows you to control the ingredients, flavors, and sweetness levels, resulting in a custom-tailored beverage.
Selecting the Right Fruit
The key to making exceptional apple and pear cider lies in selecting the right fruit. Here’s what you should consider:
Varieties: Choose apple and pear varieties that are well-suited for cider. For apples, traditional cider apples like Kingston Black, Dabinett, and Yarlington Mill are excellent choices. For pears, opt for varieties like Bartlett or Comice.
Ripeness: The fruit should be ripe but not overly soft or mushy. The best time to harvest apples and pears for cider is typically in the early autumn when they are at their peak of flavor and sugar content.
Quality: Use high-quality, clean fruit free from any rot or disease. Washing the fruit thoroughly before processing is essential to remove any dirt, pesticides, or contaminants.
Preparing the Fruit
Once you’ve selected your fruit, it’s time to prepare it for cider making. Follow these steps:
Wash and Rinse: Rinse the fruit under cold water and gently scrub away any dirt or residue. Allow the fruit to air dry or pat it dry with a clean cloth.
Core and Chop: For apples, remove the cores and cut them into quarters. For pears, cut them into halves, removing the cores. You can leave the skin on for added flavor and color.
Pressing: Place the chopped fruit in a cider press or crush it using a juicer to extract the juice. You can also use a fine mesh bag or cheesecloth to strain the juice.
Fermentation Process
Fermentation is the magical process that turns fruit juice into cider. Here’s how to get started:
Gather Equipment: You will need a fermentation vessel, airlock, and yeast for this step. Ensure that all equipment is thoroughly cleaned and sanitized.
Juice Collection: Pour the apple and pear juice into the fermentation vessel, leaving some space at the top to allow for the fermentation process. Make sure the vessel is clean and sanitized.
Add Yeast: Sprinkle a suitable cider yeast, such as a wine yeast, onto the surface of the juice. This yeast will consume the natural sugars in the juice, turning them into alcohol. Seal the vessel with an airlock to allow gases to escape during fermentation.
Fermentation Period: Place the vessel in a cool, dark place with a stable temperature. Fermentation can take anywhere from a few weeks to a few months, depending on the desired flavor and alcohol content.
Monitoring and Tasting
Throughout the fermentation period, it’s essential to monitor the cider’s progress. Here’s what to look out for:
Airlock Activity: The airlock will bubble as the yeast ferments the sugars. This is a sign that the fermentation is progressing. It’s a good idea to check the airlock regularly.
Taste Testing: After a few weeks, start tasting your cider to assess its flavor and sweetness level. When it reaches the desired taste, stop the fermentation by transferring it to another vessel or by chilling it in the refrigerator.
Bottling and Storage
Once you’re satisfied with the flavor, it’s time to bottle your apple and pear cider:
Siphoning: Siphon the cider into clean, sanitized bottles. Leave some space at the top to allow for natural carbonation. You can add priming sugar at this stage if you want a slightly fizzy cider.
Capping: Seal the bottles with caps or corks, ensuring they are secure. Label the bottles with the date of bottling.
Aging: Allow the cider to age for at least a few months, but it can improve with extended aging. Store the bottles in a cool, dark place.
Enjoy: Once aged to your liking, chill the cider and enjoy it with friends or savor it on your own.
Creative Variations and Flavors
While the classic apple and pear cider is delicious on its own, you can experiment with creative variations:
Spiced Cider: Add spices like cinnamon, cloves, and nutmeg during the fermentation or aging process for a warm, cozy flavor.
Conclusion:
Making apple and pear cider at home is an enjoyable and rewarding process that allows you to create a unique and personalized beverage. With the right fruit selection, proper preparation, careful fermentation, and aging, you can savor the delightful combination of apple and pear flavors in every sip.


