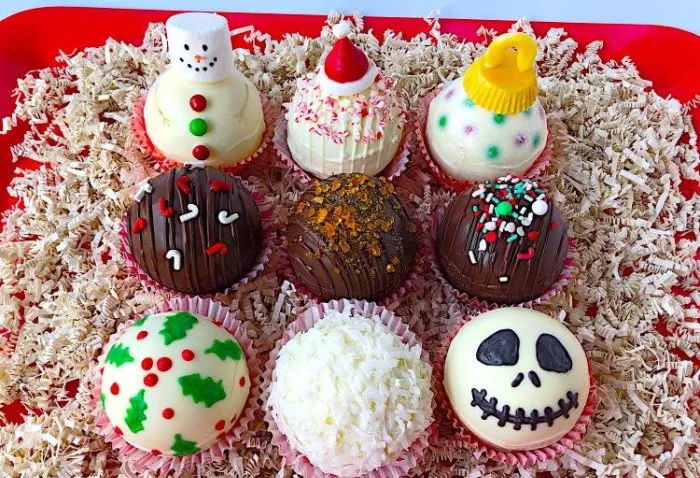
Halloween is the perfect time for indulging in sweet and spooky treats, and what’s better than Halloween cocoa bombs? These delightful chocolate spheres filled with hot cocoa mix and marshmallows are not only delicious but also a fun and festive addition to your Halloween celebrations. In this comprehensive guide, we’ll show you how to make these enchanting Halloween cocoa bombs, complete with creative decoration ideas and tips to make your Halloween cocoa bombs a hit at any gathering.
The Magic of Halloween Cocoa Bombs
Halloween cocoa bombs are a playful twist on the classic hot cocoa drink. These chocolate spheres are filled with cocoa mix and marshmallows, and they’re often adorned with fun and eerie designs. When you pour hot milk over them, the chocolate shell melts away, revealing the hidden treasures inside. It’s a magical and enjoyable way to warm up during the spooky season.
Ingredients You’ll Need
Before you begin crafting your Halloween cocoa bombs, make sure you have the following ingredients on hand:
Chocolate: Choose high-quality milk or dark chocolate for your cocoa bomb shells. You can also use colored candy melts for a vibrant Halloween touch.
Cocoa Mix: Select your favorite hot cocoa mix, or create your own by combining cocoa powder, sugar, and a pinch of salt.
Mini Marshmallows: These are an essential component of any cocoa bomb for that sweet and gooey surprise.
Decorations: Depending on your Halloween theme, gather decorations such as edible food coloring, sprinkles, edible glitter, or edible markers.
Mold: You’ll need a spherical mold to shape your cocoa bombs. Silicone molds work best, as they are easy to release the cocoa bombs once they’ve set.
Step-by-Step Guide: Making Halloween Cocoa Bombs
Now, let’s dive into the creative process of making Halloween cocoa bombs:
Step 1: Melt and Prepare the Chocolate
Melt your chosen chocolate in a microwave-safe bowl or using a double boiler. If using a microwave, heat the chocolate in 20-second intervals, stirring in between, until it’s smooth and completely melted.
If you’re going for colorful cocoa bombs, add food coloring to the melted chocolate and mix it thoroughly until you achieve the desired color.
Step 2: Coat the Mold
Using a spoon or a pastry brush, carefully coat the inside of each mold cavity with the melted chocolate, ensuring an even layer. Make sure the chocolate reaches the top edges of the mold.
Place the coated molds in the refrigerator for about 5 minutes to allow the chocolate to harden. This creates a sturdy shell for your cocoa bombs.
Step 3: Create the Shells
Carefully remove the molds from the refrigerator and apply a second coat of melted chocolate, focusing on the edges to reinforce the structure. Chill the molds in the refrigerator for another 5 minutes.
Once the chocolate has set, gently release the chocolate shells from the molds. Be cautious not to crack or break them.
Step 4: Fill the Shells
Place a spoonful of cocoa mix and a small bunch of mini marshmallows in half of the chocolate shells.
Heat a plate in the microwave and, while it’s warm, place the empty chocolate shells on it to slightly melt the edges. Quickly press each empty shell onto a filled one, sealing the two halves together.
Step 5: Decorate
Let your creative juices flow as you decorate your Halloween cocoa bombs. Use food coloring to draw spooky faces, drizzle contrasting colored chocolate over them, or add edible glitter and sprinkles to create a festive look.
Step 6: Store and Serve
Allow your Halloween cocoa bombs to set completely at room temperature or in the refrigerator, depending on the temperature of your kitchen.
To serve, place a cocoa bomb in a mug and pour hot milk over it. As the chocolate shell melts, it will reveal the cocoa mix and marshmallows, creating a delightful and spooky hot cocoa.
Tips for Making Perfect Halloween Cocoa Bombs
To ensure your Halloween cocoa bombs turn out fabulous, consider these tips:
Handle with Care: Be gentle when removing the chocolate shells from the molds to avoid cracking.
Double Coating: Two coats of chocolate ensure a sturdy shell. Don’t skip this step.
Don’t Overfill: Avoid overfilling the shells, as this can make it challenging to seal them properly.
Keep Decorations Simple: While it’s tempting to go all out with decorations, remember that the cocoa bombs need to dissolve when hot milk is added. Too many decorations can hinder the melting process.
Conclusion:
Making Halloween cocoa bombs is not only a delicious endeavor but also a fun and creative one. These enchanting spheres of chocolate filled with hot cocoa mix and marshmallows are sure to be a hit at your Halloween gatherings.


